分类目录归档:C++

Windows编译pdfium

确定 Visual Studio 和 Windows SDK 版本

  • 需要Visual Studio2017 及以上
  • Windows SDK 10.0.19041 及以上(需要Debugging Tools For Windows)
  • 安装Desktop development with C++
  • 安装MFC/ATL support

设置全局代理

set DEPOT_TOOLS_WIN_TOOLCHAIN=0
set DEPOT_TOOLS_UPDATE=0
set http_proxy=127.0.0.1:1080
set https_proxy=127.0.0.1:1080
set GYP_MSVS_VERSION=2022

安装 depot_tools

  • 下载 depot_tools ,并解压缩到d:\sdk\depot_tools目录
  • 系统path环境变量添加d:\sdk\depot_tools
  • 将然后设置vs2022_install环境变量为D:\Program Files\Microsoft Visual Studio\2022\Community
  • 运行gclient

验证Python安装

命令行输入where python,确保D:\sdk\depot_tools\python.bat在第一条,
如果不是则修改PATH环境变量顺序

下载 pdfium 代码

以管理员身份打开命令提示符,进入D:\cproject\pdfium目录

gclient config --unmanaged https://pdfium.googlesource.com/pdfium.git
gclient sync

生成构建文件

cd pdfium
gn args --ide=vs out\Default

out\Default\args.gn如下

# Set build arguments here. See `gn help buildargs`.

use_goma = false

clang_use_chrome_plugins = false

pdf_is_standalone = true

pdf_use_skia = false
pdf_use_skia_paths = false

is_debug = false

is_component_build = true

pdf_is_complete_lib = false

pdf_enable_xfa = false

pdf_enable_v8 = false

target_cpu = "x86"

is_clang = true

禁用v8可以提高编译性能,使用clang可以提高编译和程序运行性能,如果VS编译不通过,就尝试使用clang试试。

编译测试

编译测试程序

ninja -C out\Default pdfium_test # 编译测试程序
pdfium_test --help # 运行测试程序

编译windows动态库dll

# 首先需要将 is_component_build 改为 true
ninja -C out\Default pdfium # 编译动态库
参考

Qt Windows CMakeLists.txt 注意事项

改为32位GUI启动

默认会出现命令行黑窗口,需要添加图形界面类型

if(WIN32)
    set(GUI_TYPE WIN32)
elseif(APPLE)
    set(GUI_TYPE MACOSX_BUNDLE)
endif()

add_executable(${CMAKE_PROJECT_NAME} ${GUI_TYPE} ${SRC} ${RES})

为QT应用添加管理员权限

set_target_properties(${PROJECT_NAME} PROPERTIES LINK_FLAGS "/MANIFESTUAC:\"level='requireAdministrator' uiAccess='false'\"")

解决复制dll错误问题

第一次复制成功后,注释以下代码

    foreach (QT_LIB ${REQUIRED_LIBS})
        add_custom_command(TARGET ${PROJECT_NAME} POST_BUILD
                COMMAND ${CMAKE_COMMAND} -E copy
                "${QT_INSTALL_PATH}/bin/Qt${QT_VERSION}${QT_LIB}${DEBUG_SUFFIX}.dll"
                "$<TARGET_FILE_DIR:${PROJECT_NAME}>")
    endforeach (QT_LIB)

设置CMAKE_PREFIX_PATH路径

set(CMAKE_PREFIX_PATH "D:\\Qt\\Qt5.12.9\\5.12.9\\msvc2017\\")

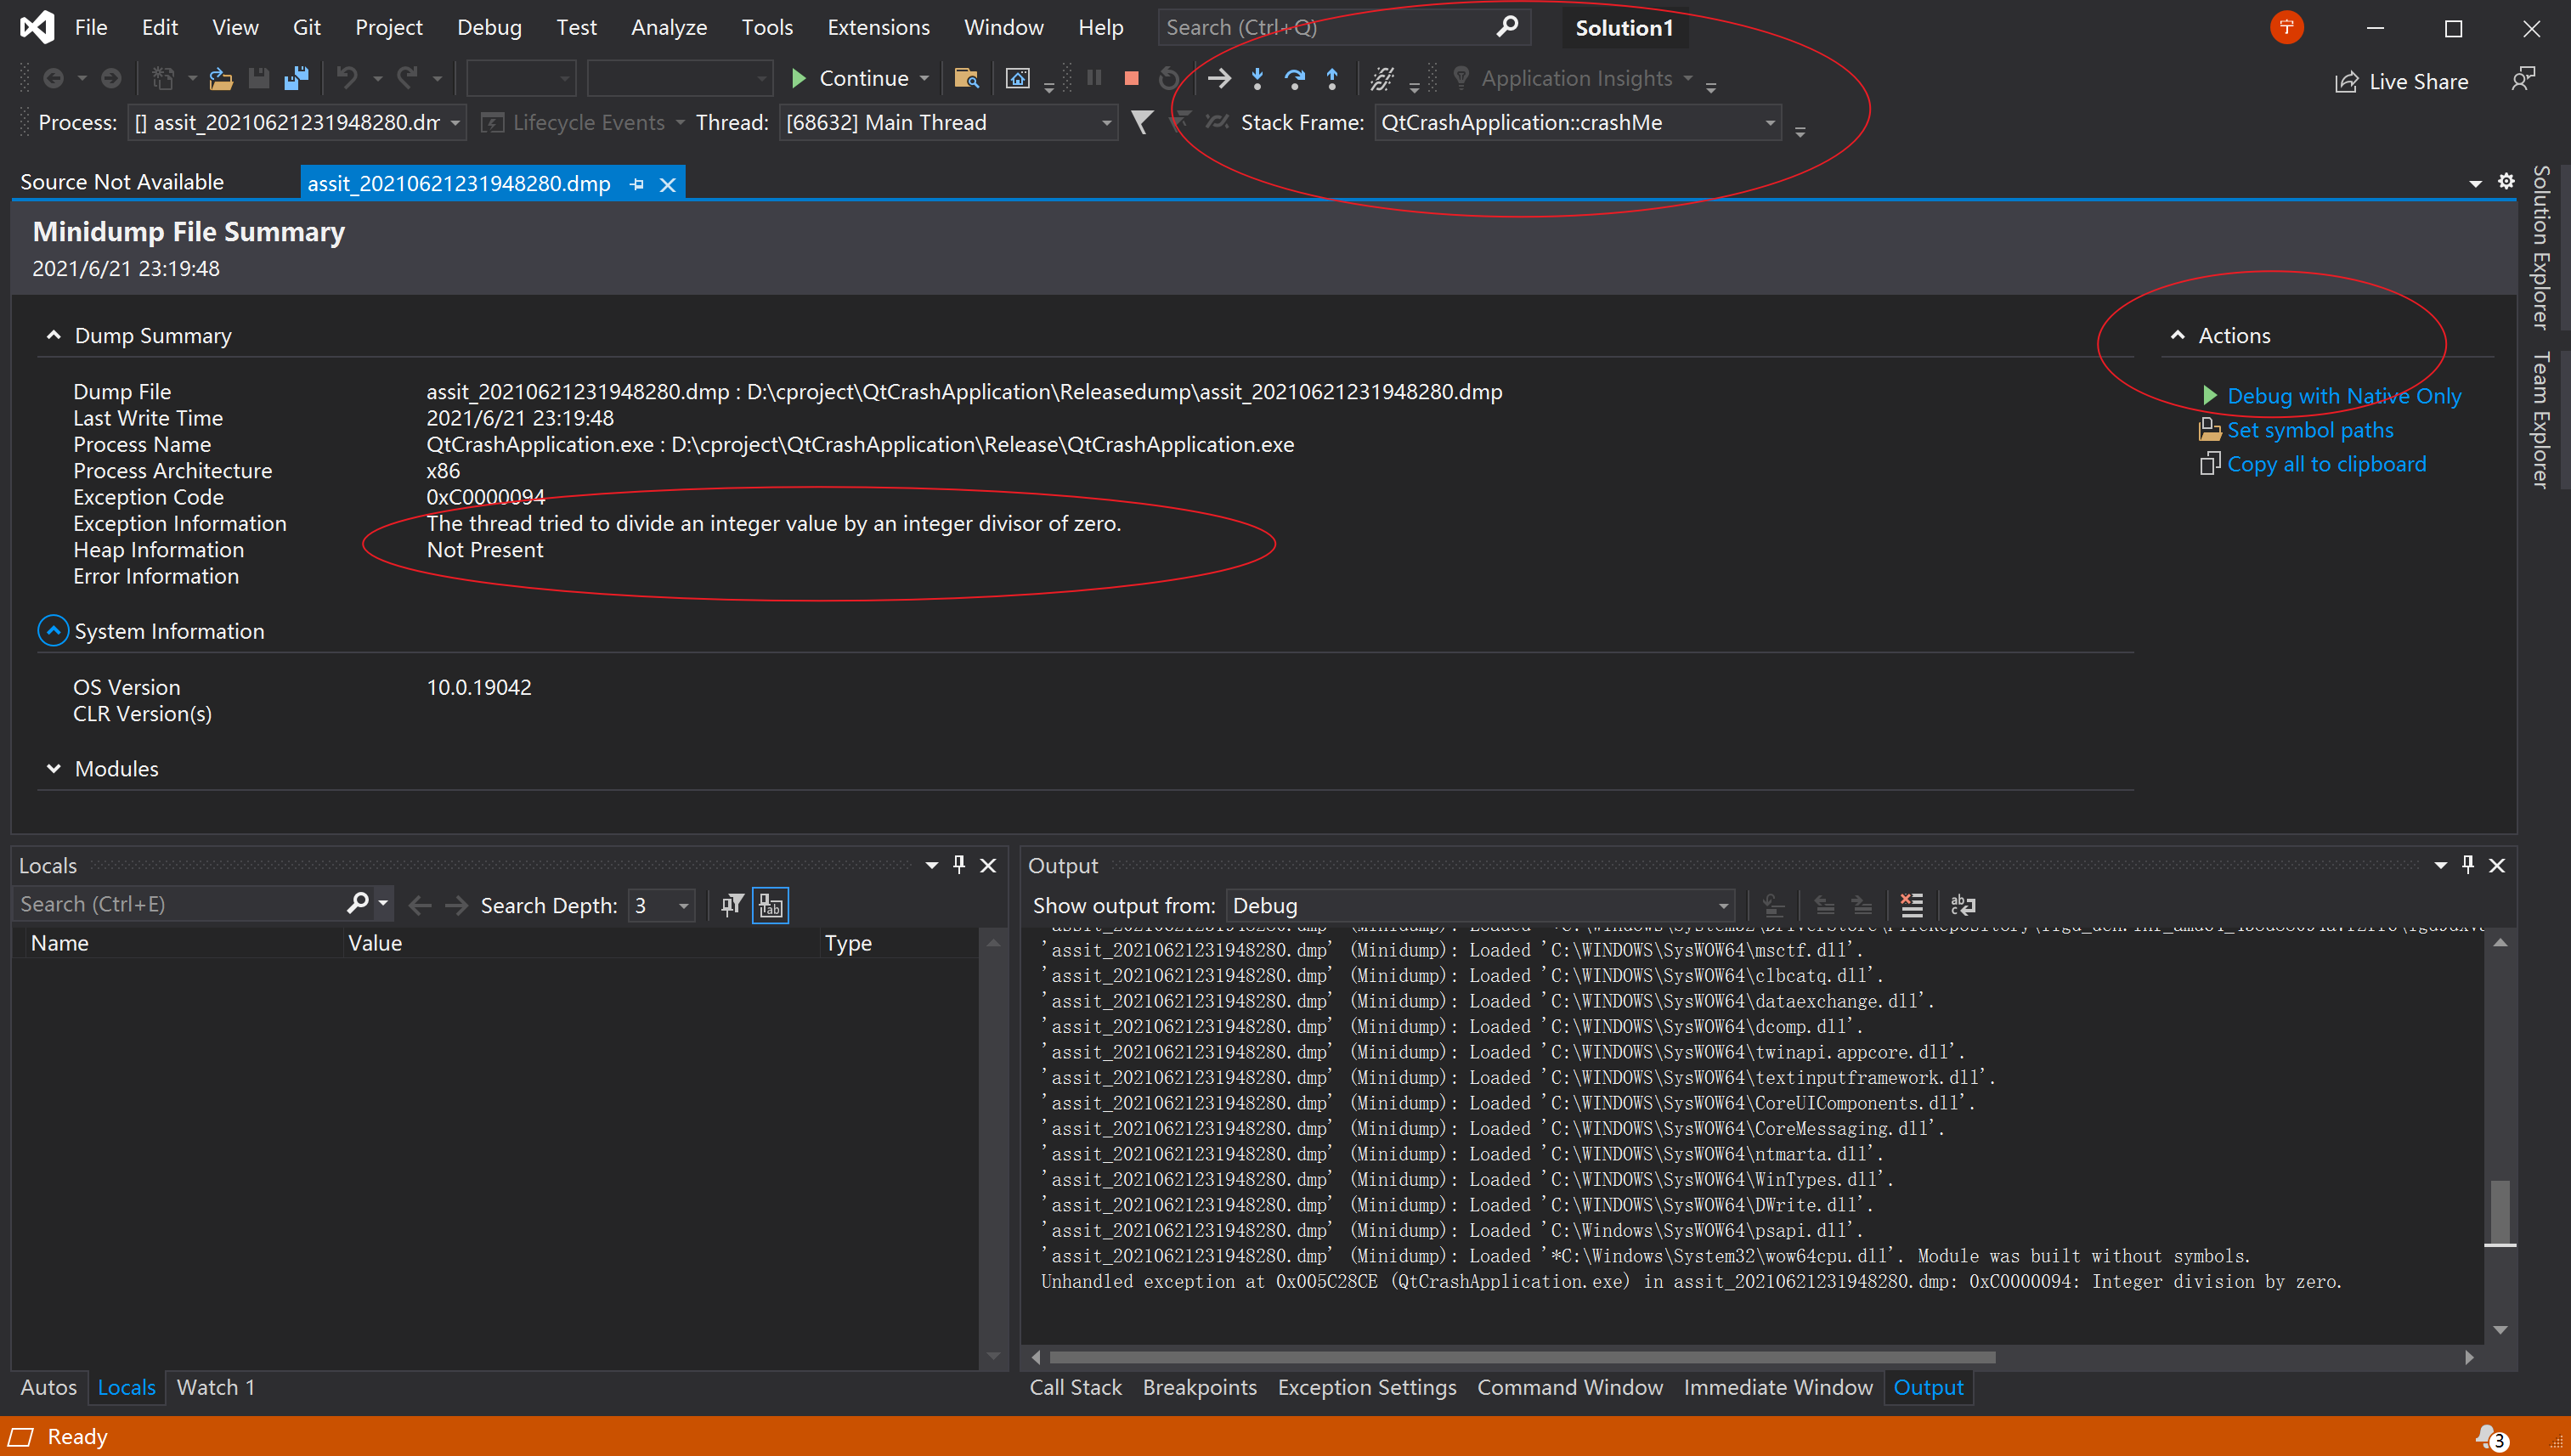
捕获Qt Crash全图教程

关键点

  • 在main.cpp引入SetUnhandledExceptionFilter程序奔溃时生成dmp文件(代码)
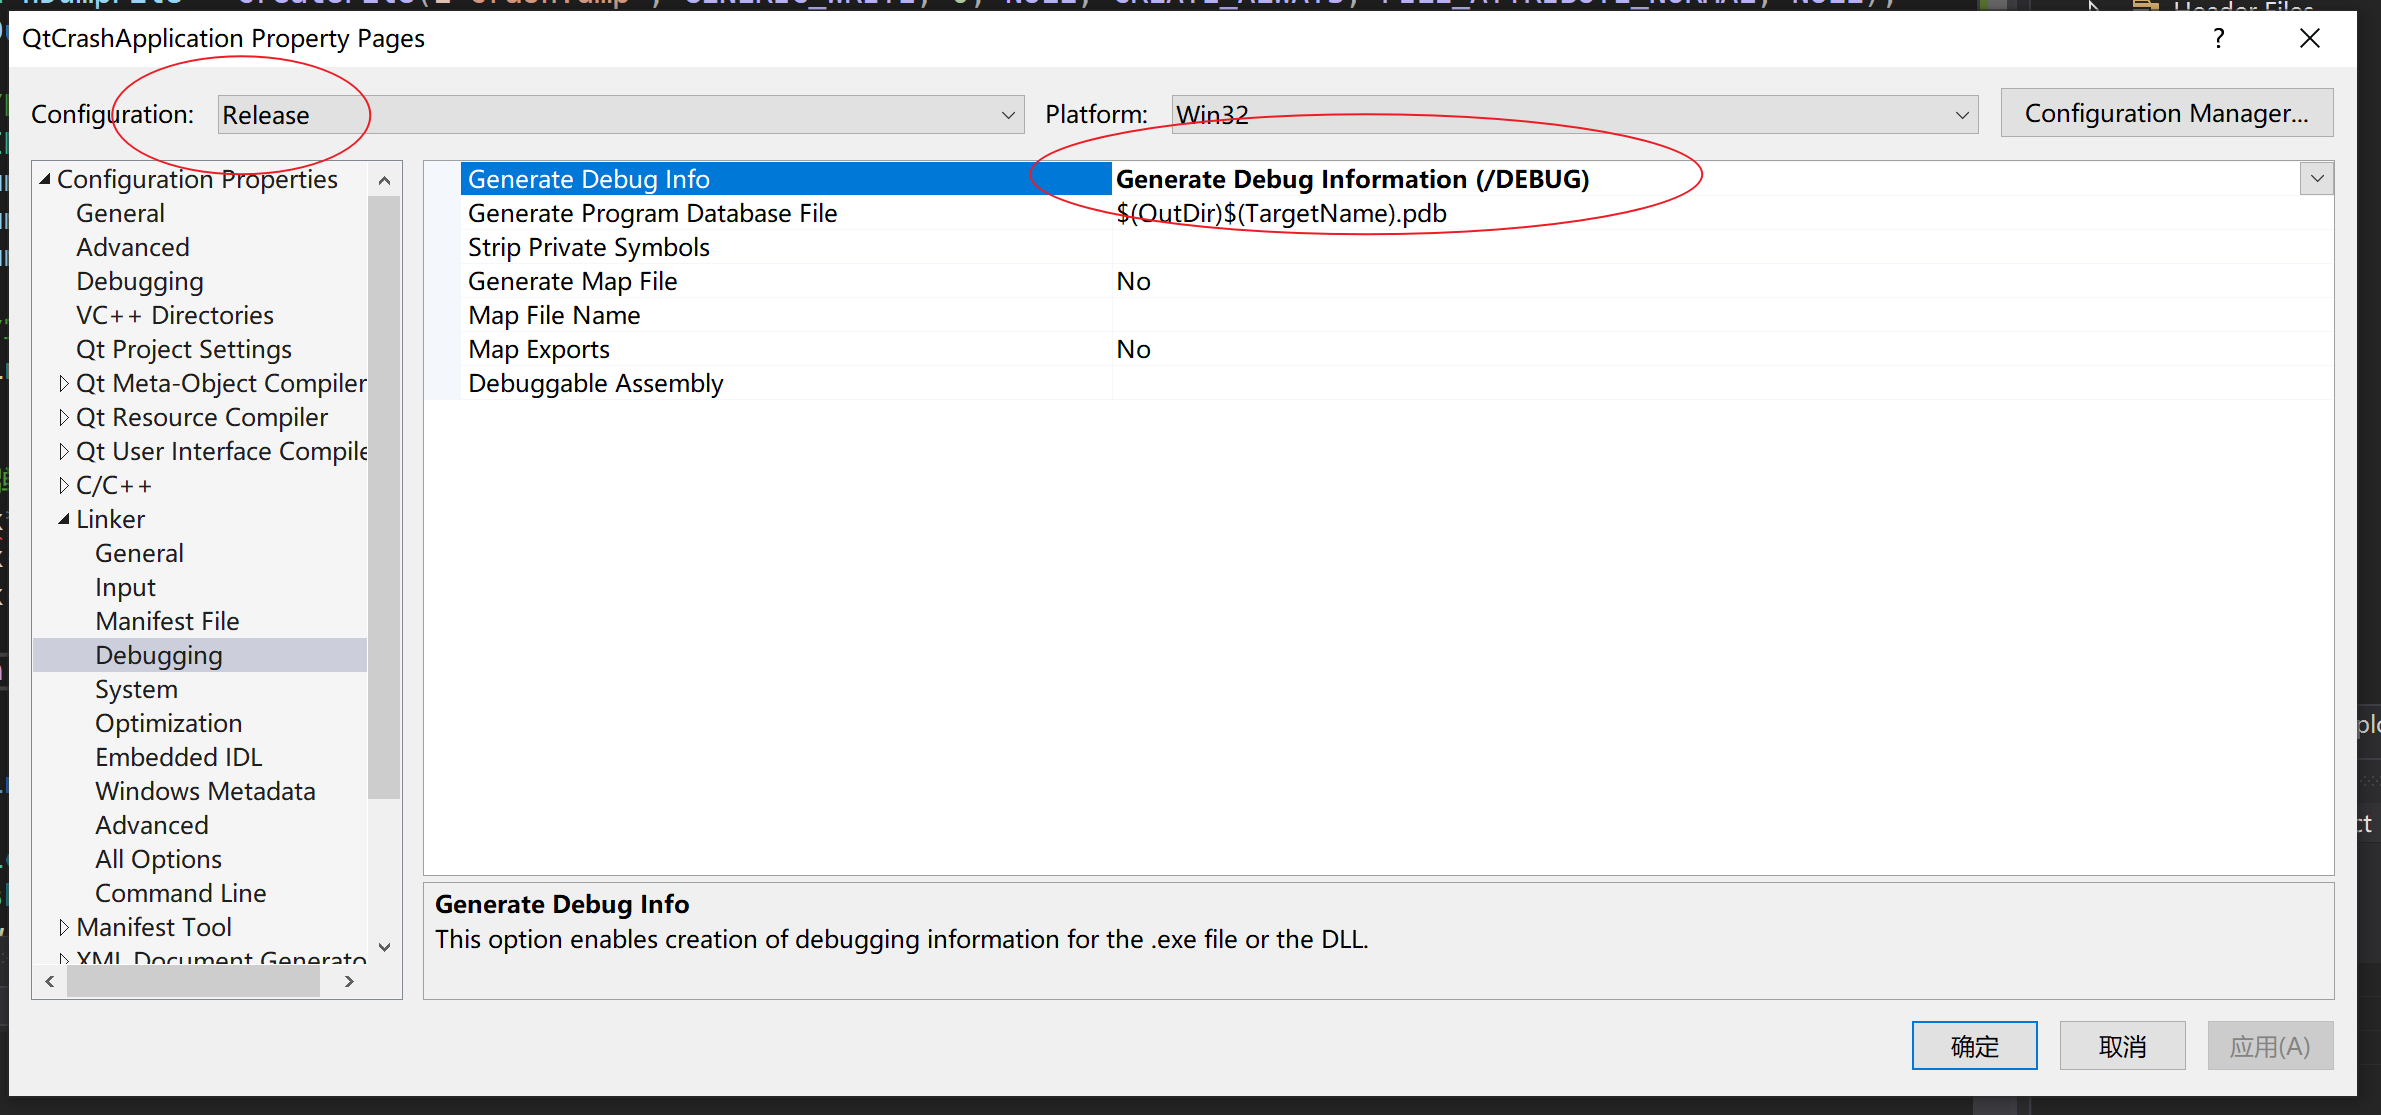
  • Build release时包含debug信息(图)
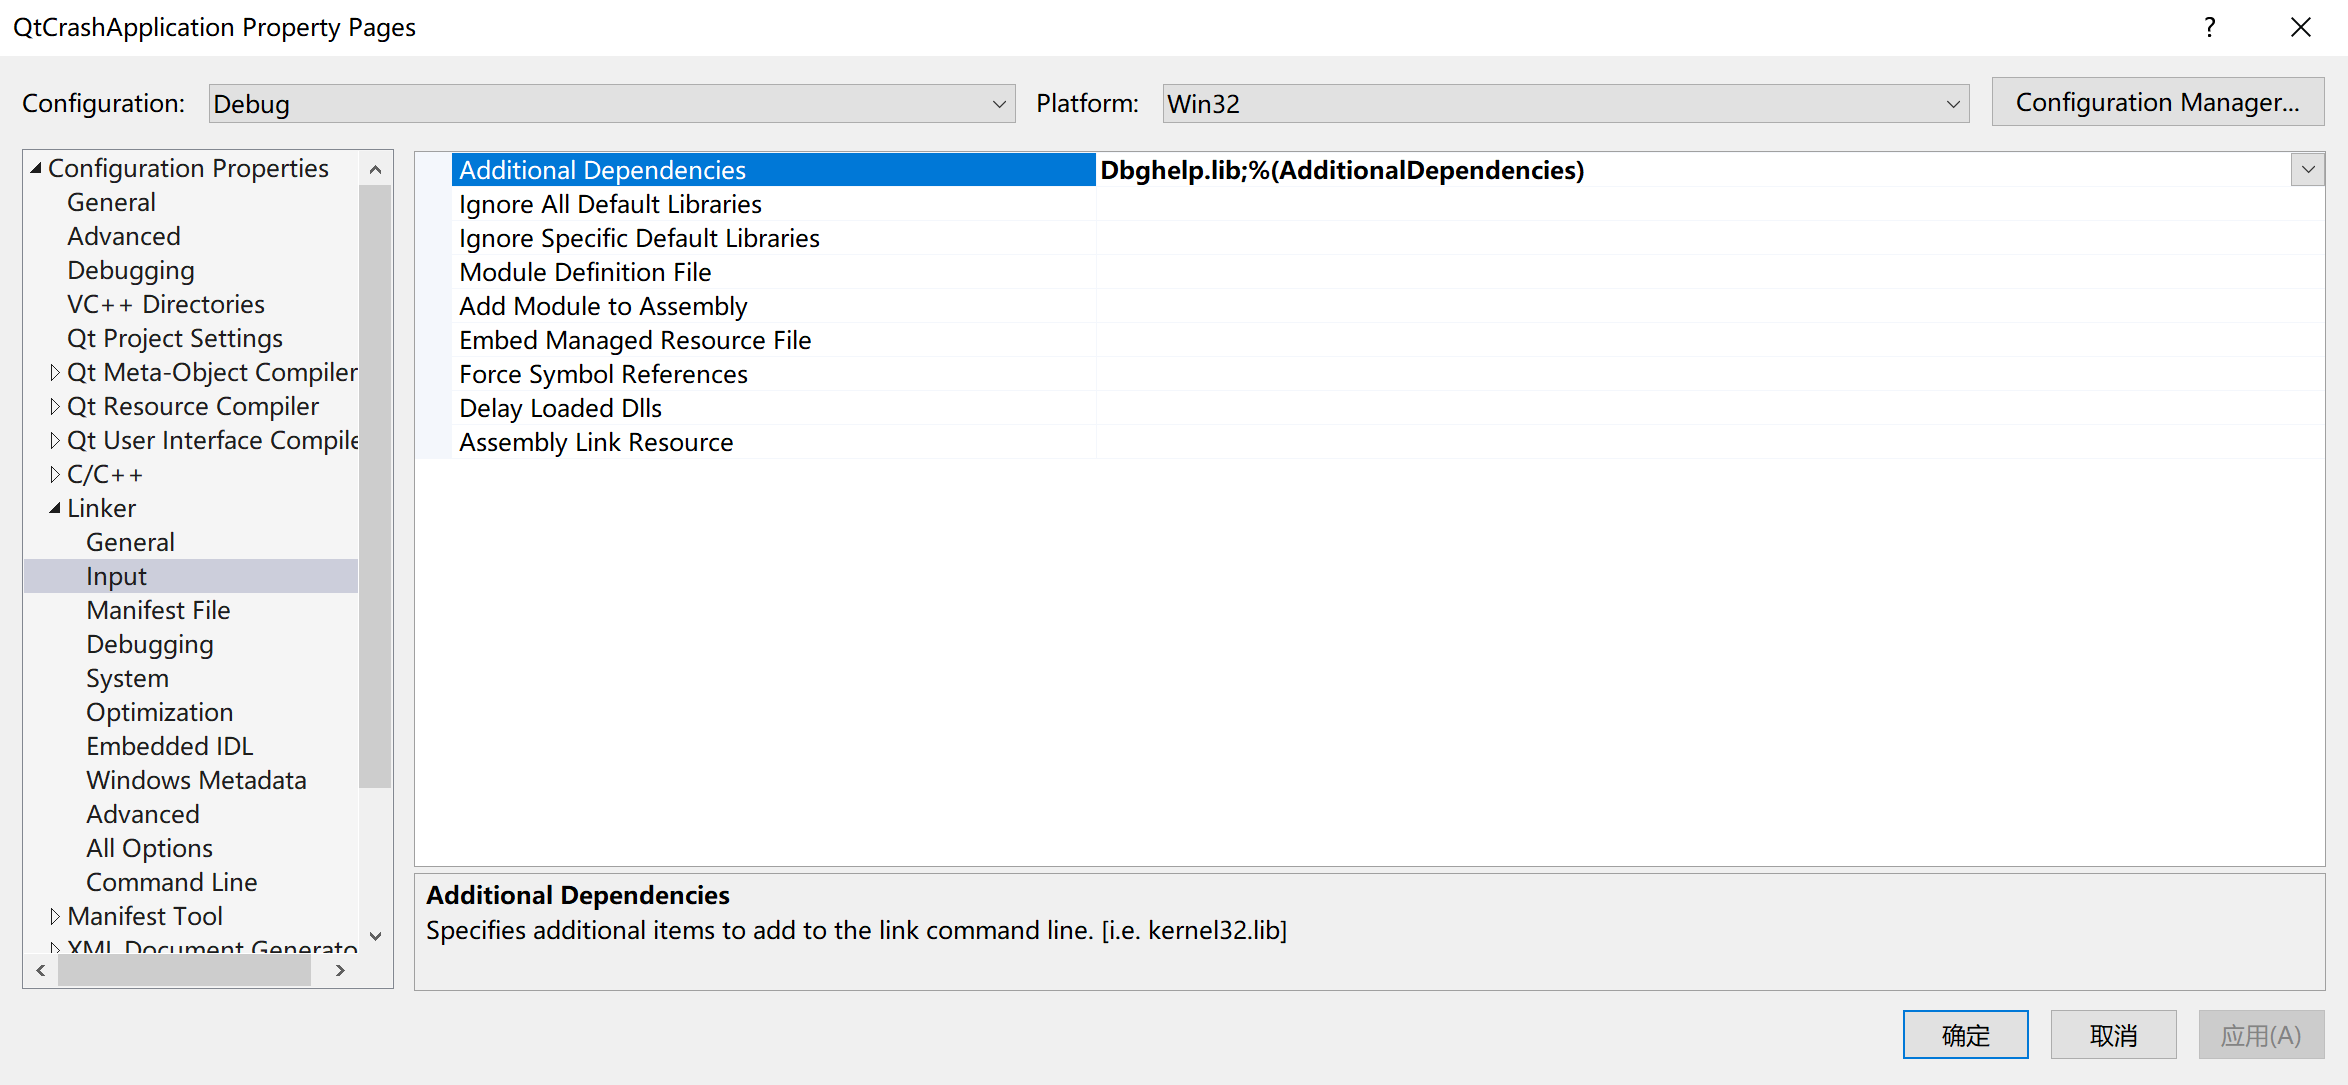
  • Link dbghelp.lib库(图)
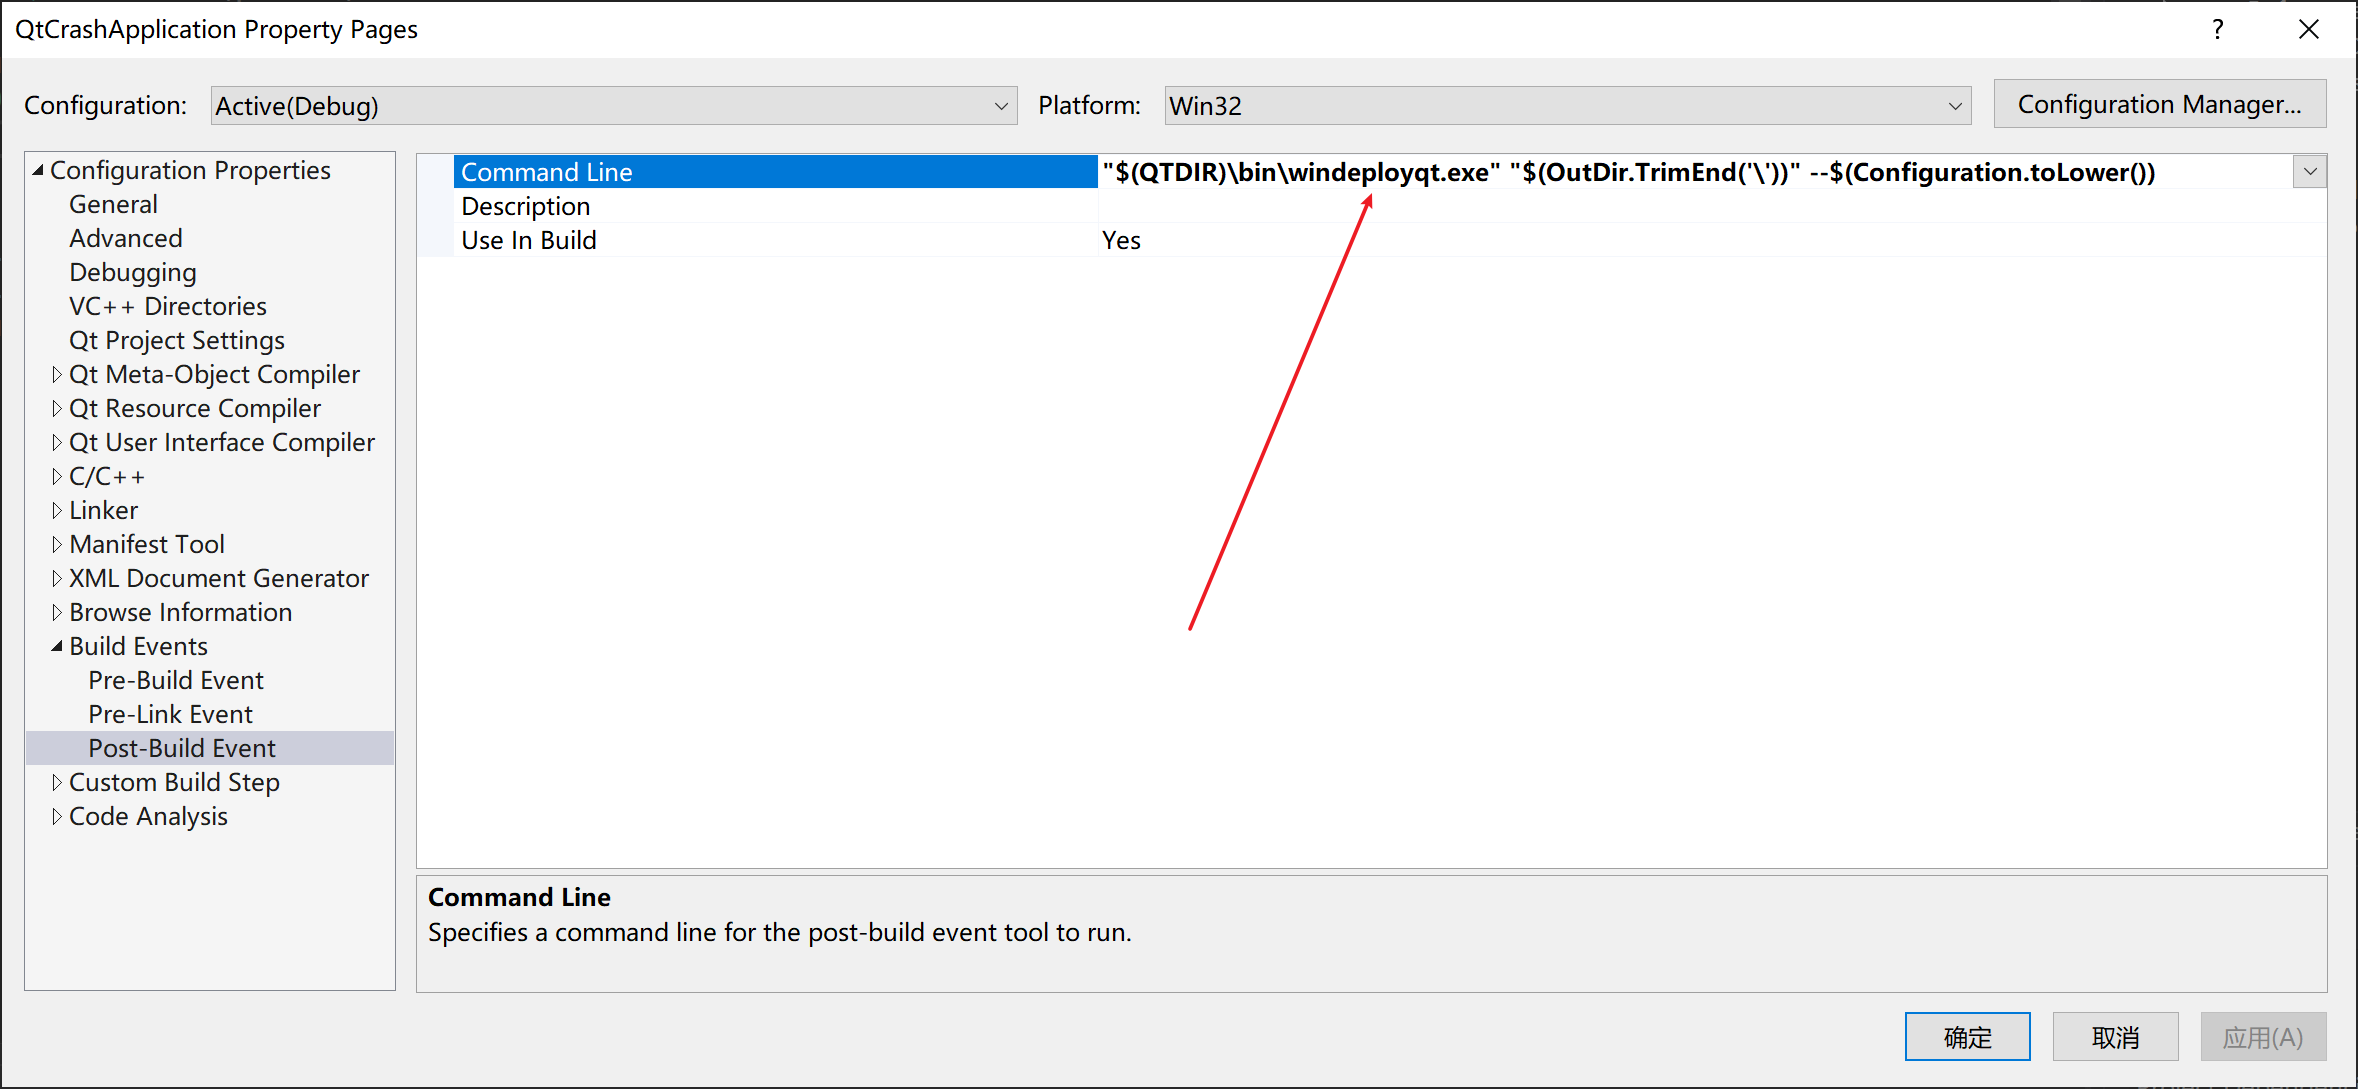
  • Build post自动复制qt依赖库(图)

Qt捕获Crash示例代码下载

Qt捕获Crash关键代码

main.cpp

#include <QtWidgets/QApplication>
#include <QMessageBox>
#include <QDateTime>
#include <QDir>
#include <QDebug>
#include "QtCrashApplication.h"
#include "main.h"

#ifdef Q_OS_WIN
#include <Windows.h>
#include <DbgHelp.h>
#endif

#ifdef Q_OS_WIN
static LONG WINAPI exceptionCallback(struct _EXCEPTION_POINTERS* exceptionInfo)
{
    QCoreApplication* app = QApplication::instance();

    QString savePath = app->applicationDirPath() + "dump/";
    qDebug() << "save path :" << savePath;
    QDir dir(savePath);
    if (!dir.exists() && !dir.mkpath(savePath)) {
        app->exit(E_UNEXPECTED);
        return EXCEPTION_EXECUTE_HANDLER;
    }

    savePath.append("assit_");
    savePath.append(QDateTime::currentDateTime().toString("yyyyMMddhhmmsszzz"));
    savePath.append(".dmp");

    HANDLE dump = CreateFileW(savePath.toStdWString().c_str(), GENERIC_WRITE,
        0, NULL, CREATE_ALWAYS, FILE_ATTRIBUTE_NORMAL, NULL);
    if (INVALID_HANDLE_VALUE == dump) {
        app->exit(E_UNEXPECTED);
        return EXCEPTION_EXECUTE_HANDLER;
    }

    MINIDUMP_EXCEPTION_INFORMATION miniDumpExceptionInfo;
    miniDumpExceptionInfo.ExceptionPointers = exceptionInfo;
    miniDumpExceptionInfo.ThreadId = GetCurrentThreadId();
    miniDumpExceptionInfo.ClientPointers = TRUE;
    DWORD idProcess = GetCurrentProcessId();
    MiniDumpWriteDump(GetCurrentProcess(), idProcess, dump,
        MiniDumpNormal, &miniDumpExceptionInfo, NULL, NULL);

    CloseHandle(dump);

    app->exit(E_UNEXPECTED);
    return EXCEPTION_EXECUTE_HANDLER;
}
#endif

int main(int argc, char* argv[])
{
    QApplication a(argc, argv);

#ifdef Q_OS_WIN
    SetUnhandledExceptionFilter(exceptionCallback);
#endif

    QtCrashApplication w;
    w.show();
    return a.exec();
}

QtCrashApplication.cpp

#include "QtCrashApplication.h"

QtCrashApplication::QtCrashApplication(QWidget *parent)
    : QMainWindow(parent)
{
    ui.setupUi(this);
    QObject::connect(ui.CrashButton, SIGNAL(clicked()), this, SLOT(crashMe()));
}

void QtCrashApplication::crashMe() {
    int i = 0;
    int n = 1 / i;
    ui.CrashButton->setText(QString(n));
}

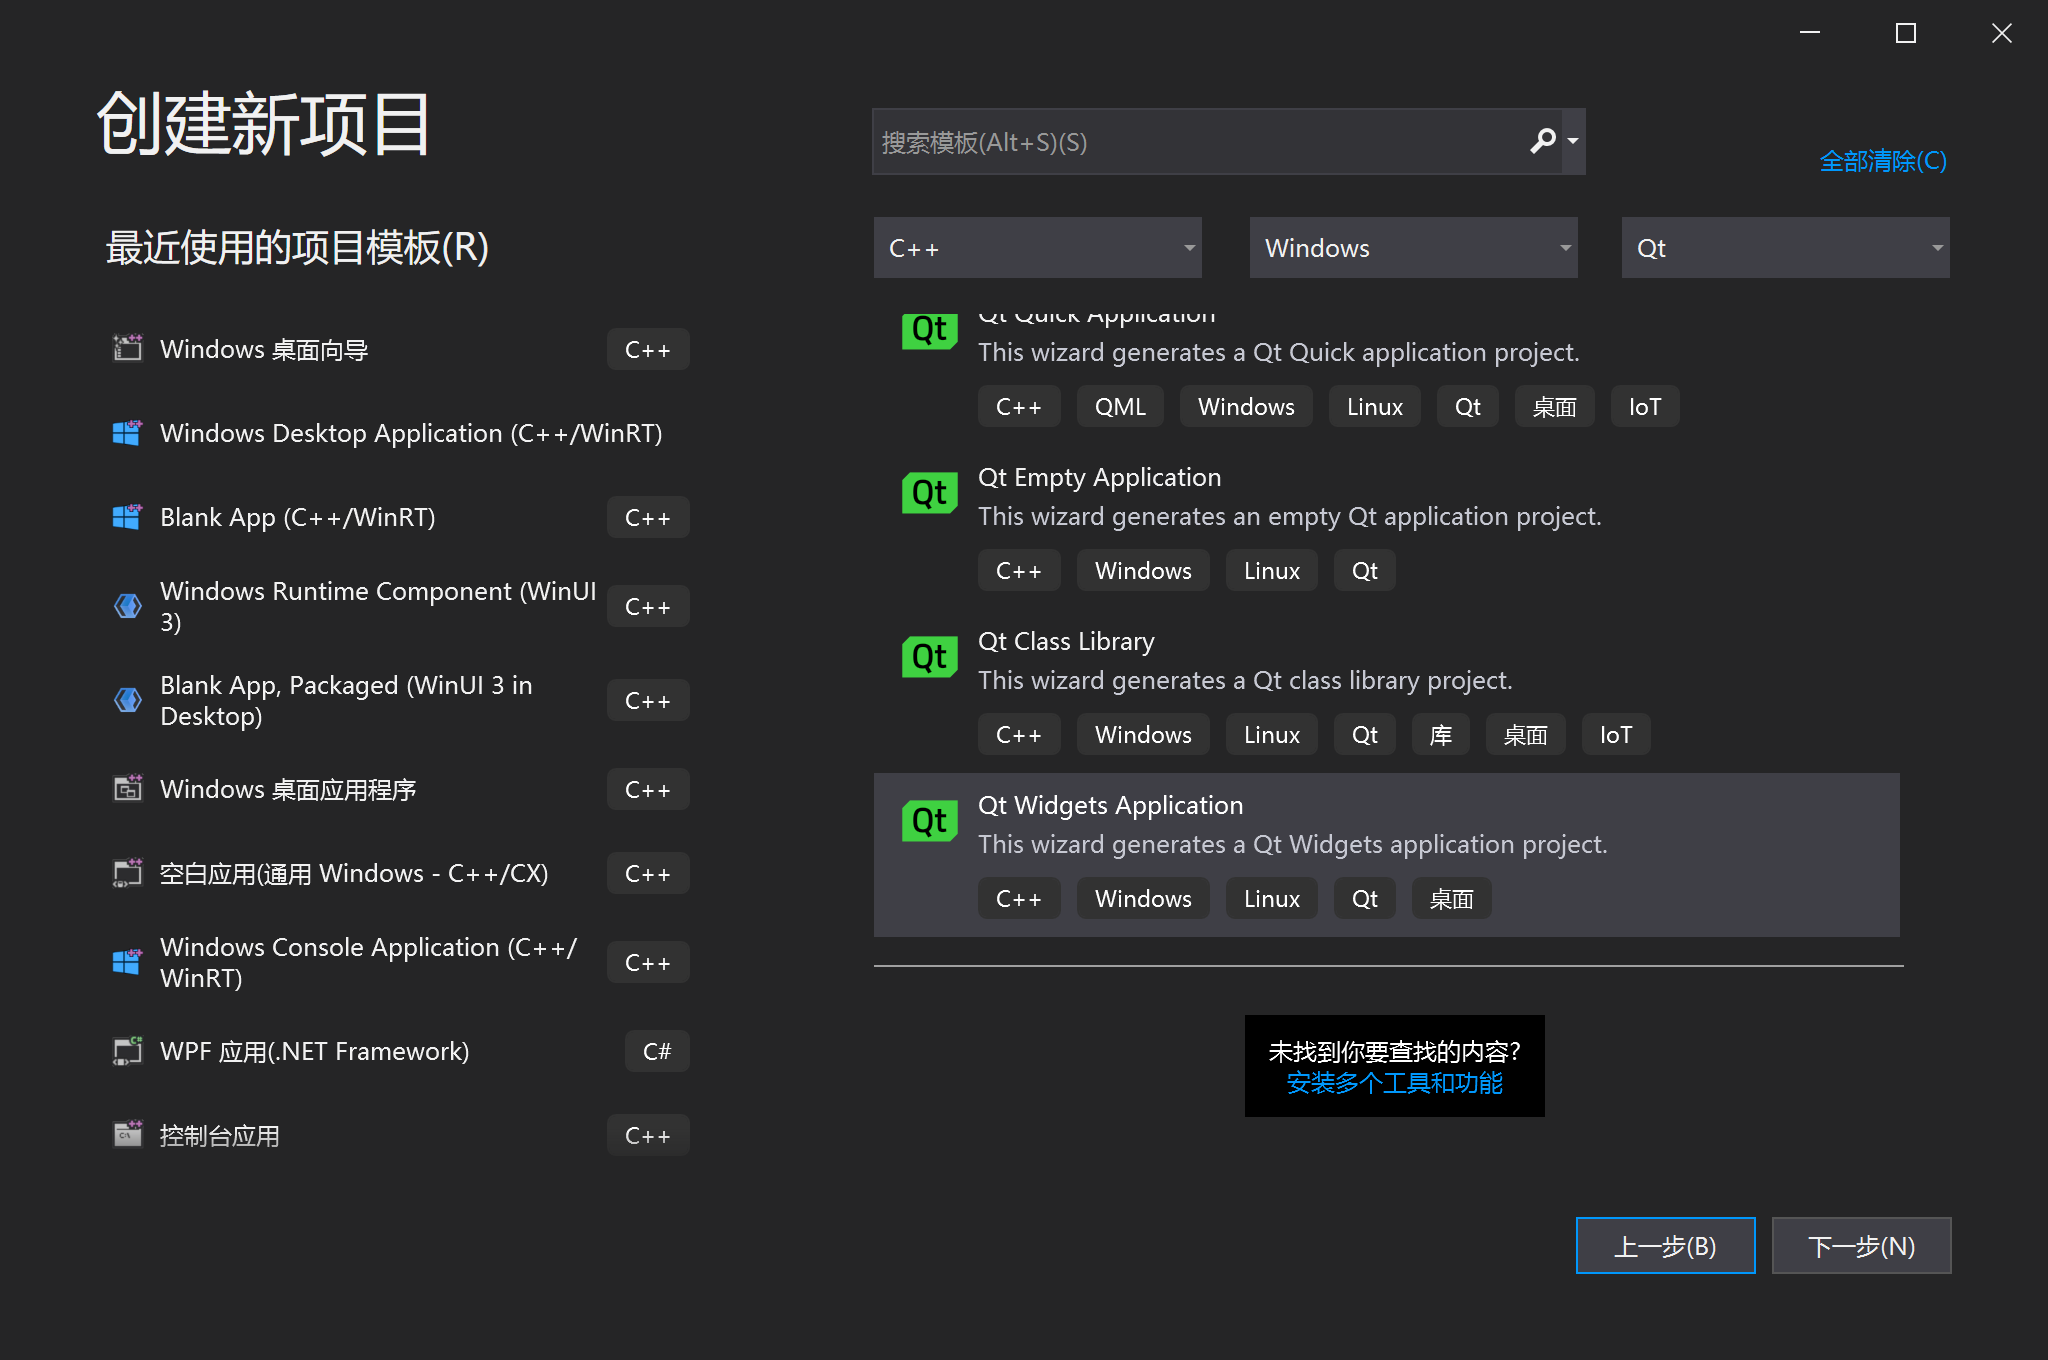
新建项目

新建项目

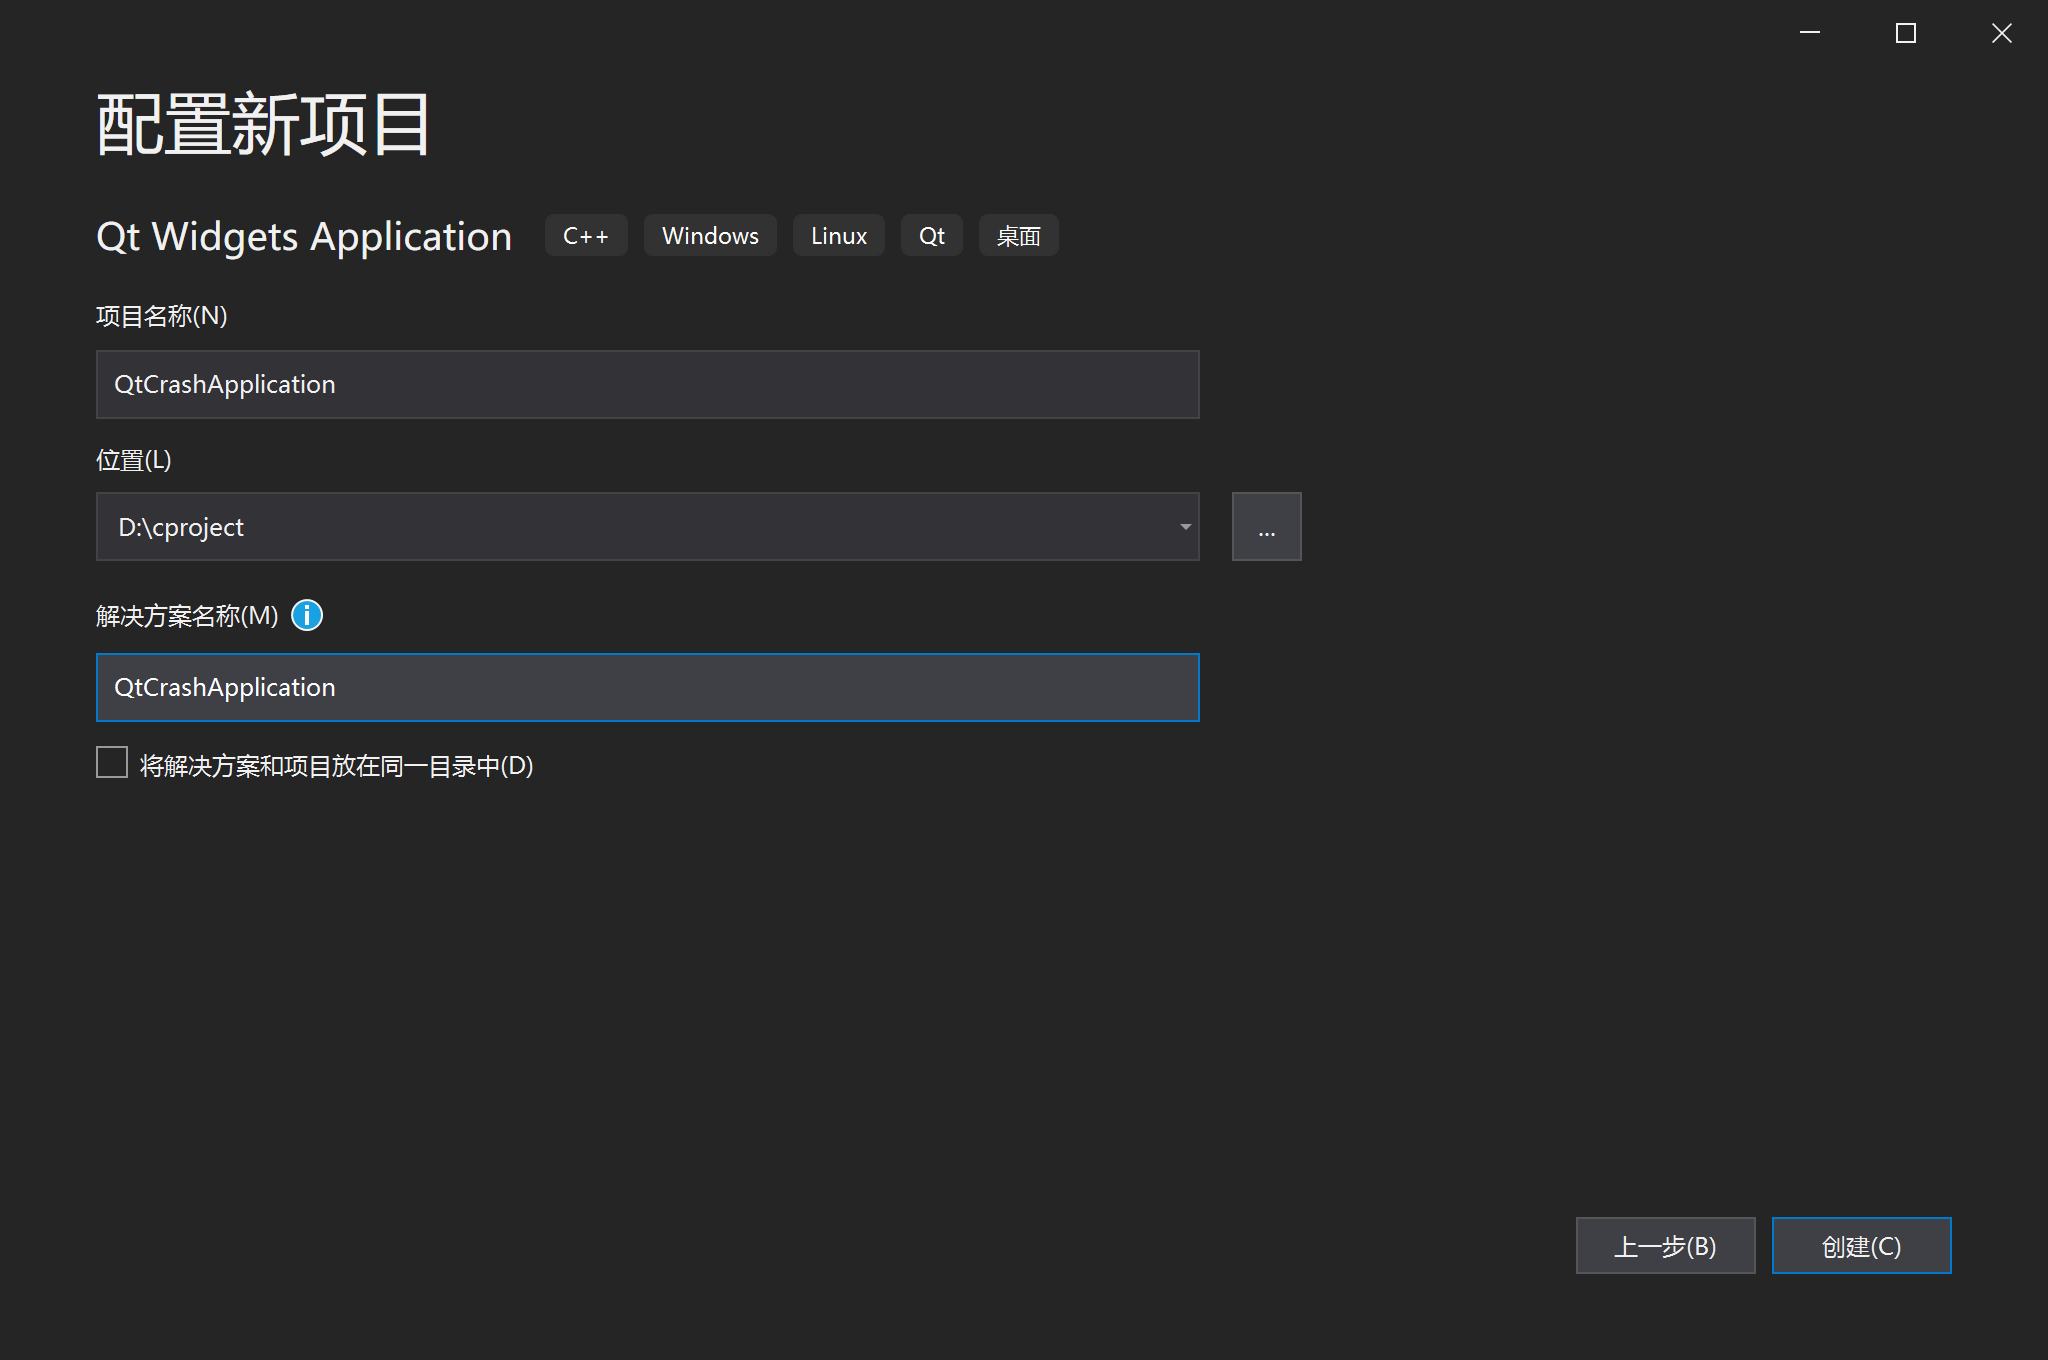
配置项目

配置项目

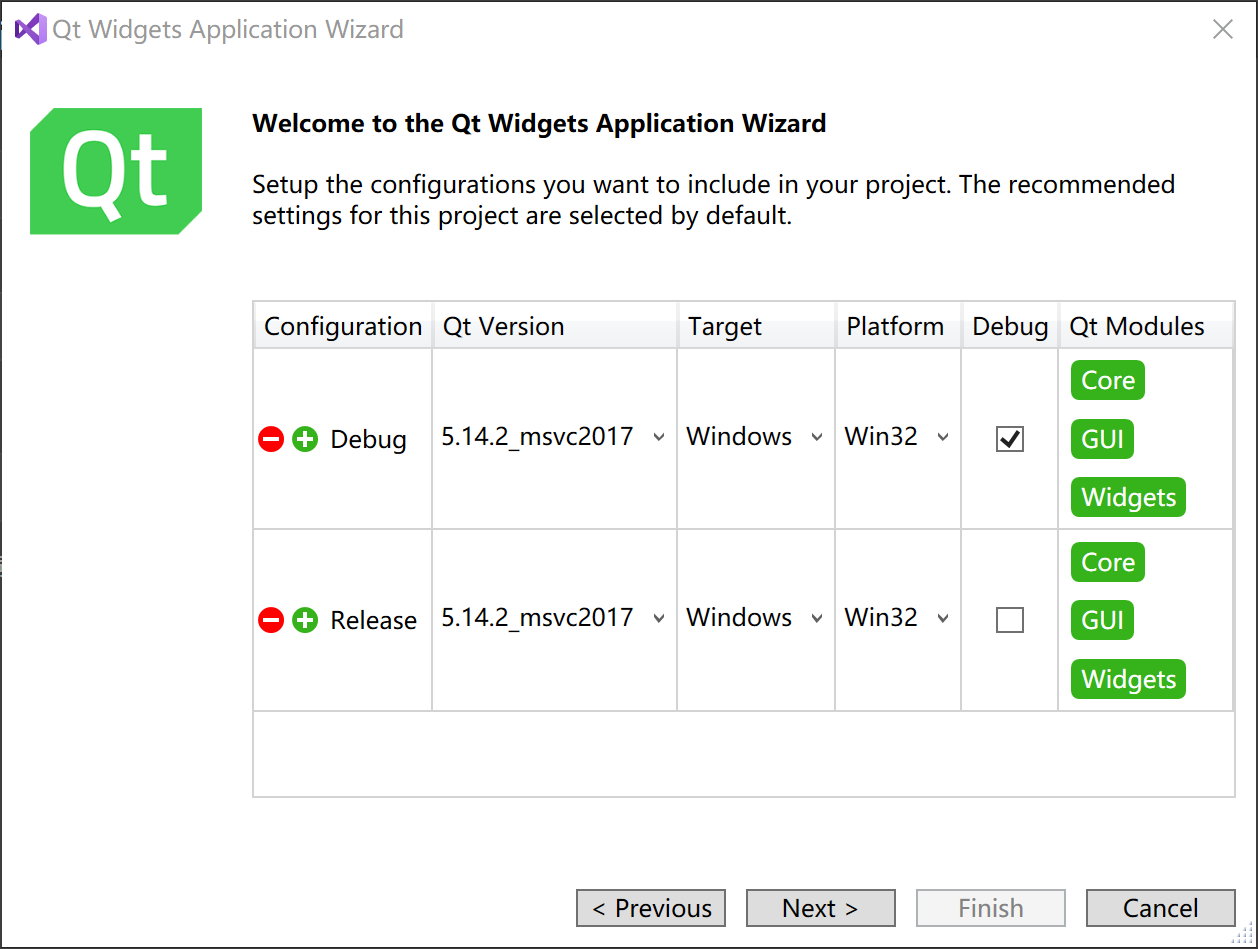
项目配置向导

项目配置向导

项目配置向导2

项目配置向导2

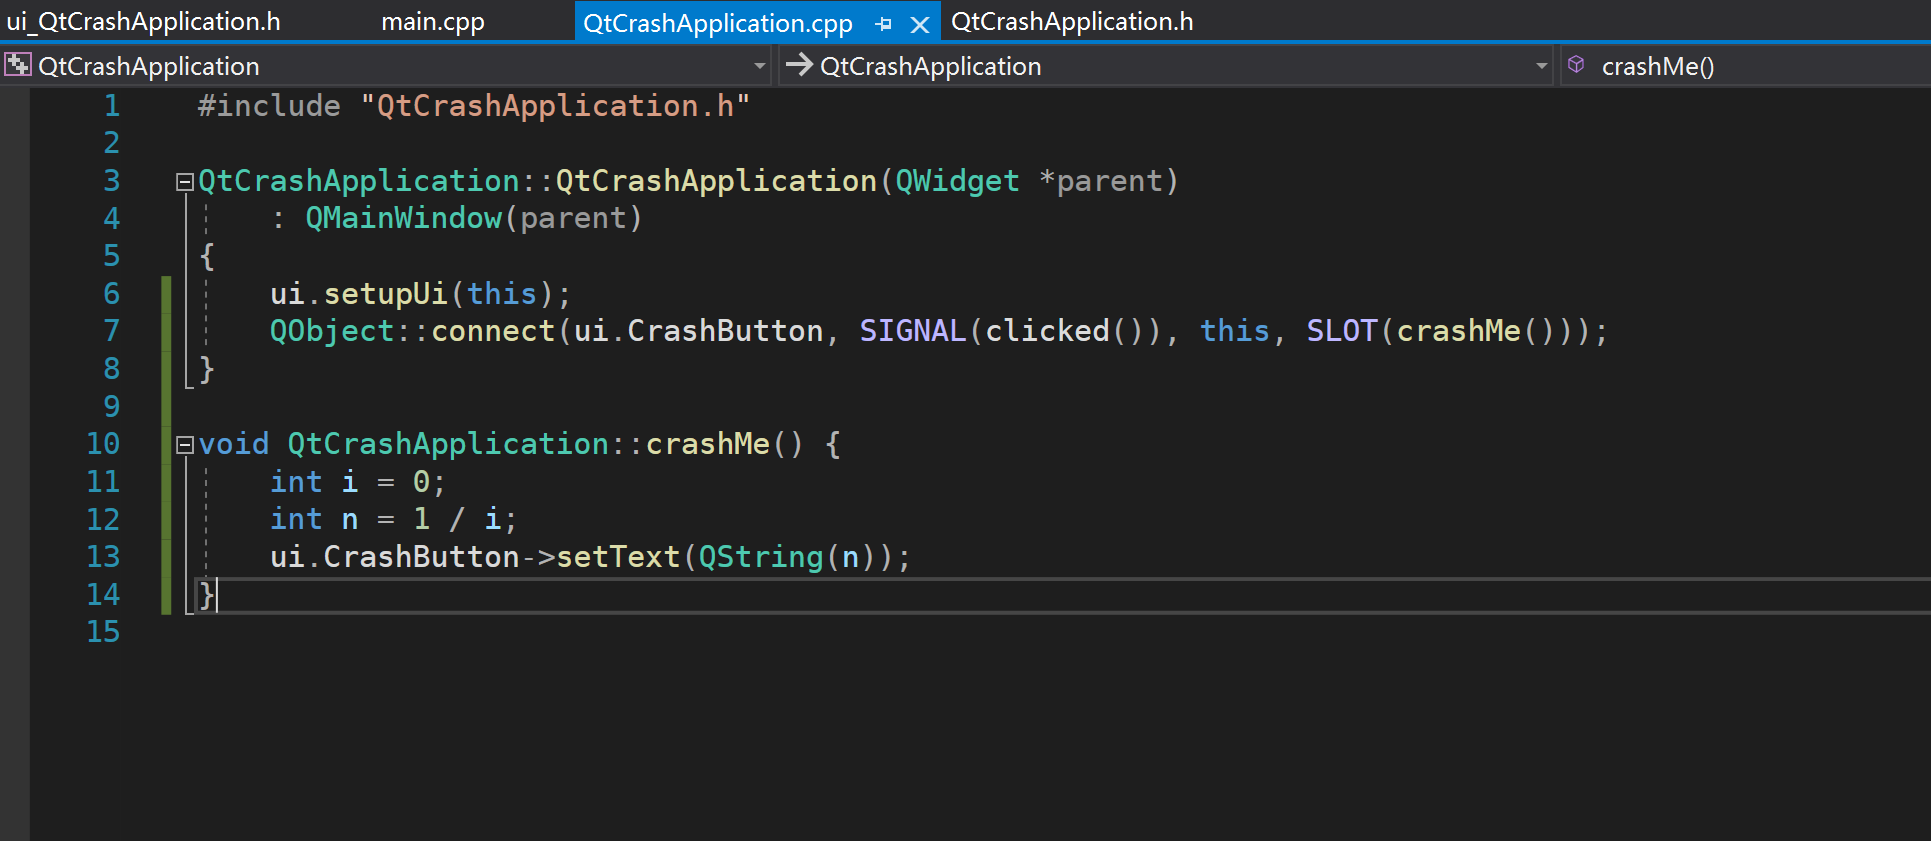
编写会奔溃程序

编写会奔溃程序

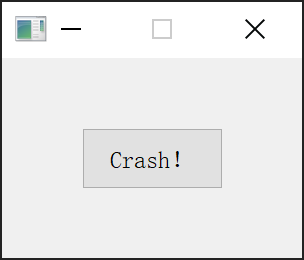
程序运行截图

程序运行截图

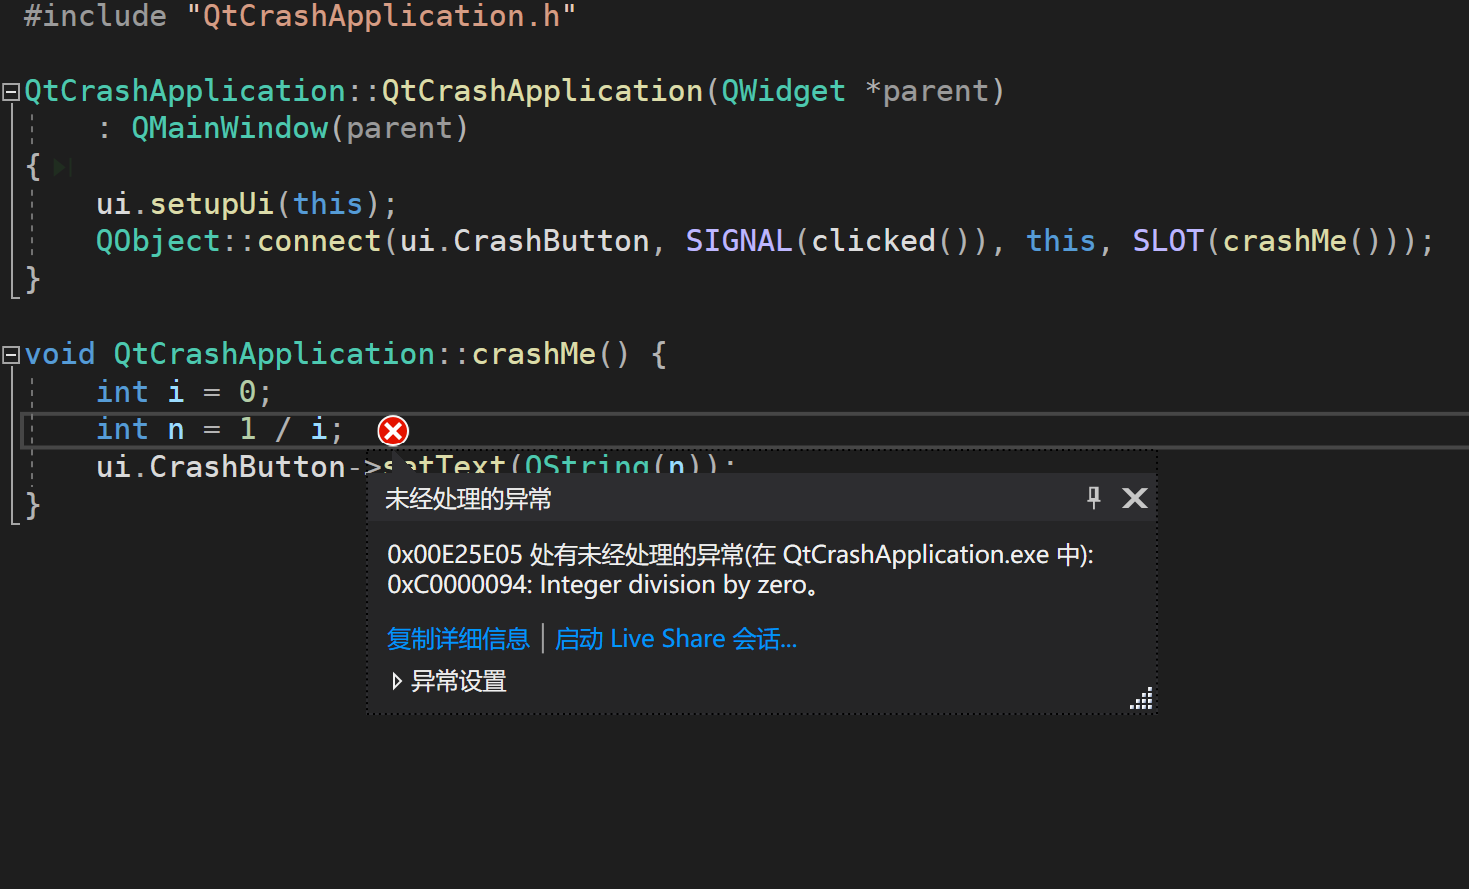
点击运行后出现异常

点击运行后出现异常

自动生成依赖qt库

"$(QTDIR)\bin\windeployqt.exe" "$(OutDir.TrimEnd('\'))" --$(Configuration.toLower())

自动生成依赖qt库

自动生成依赖库

自动生成依赖库

生成release时生成debug信息

生成release时生成debug信息

包含dbghelp.lib库

包含dbghelp.lib库

查看生成记录

查看生成记录

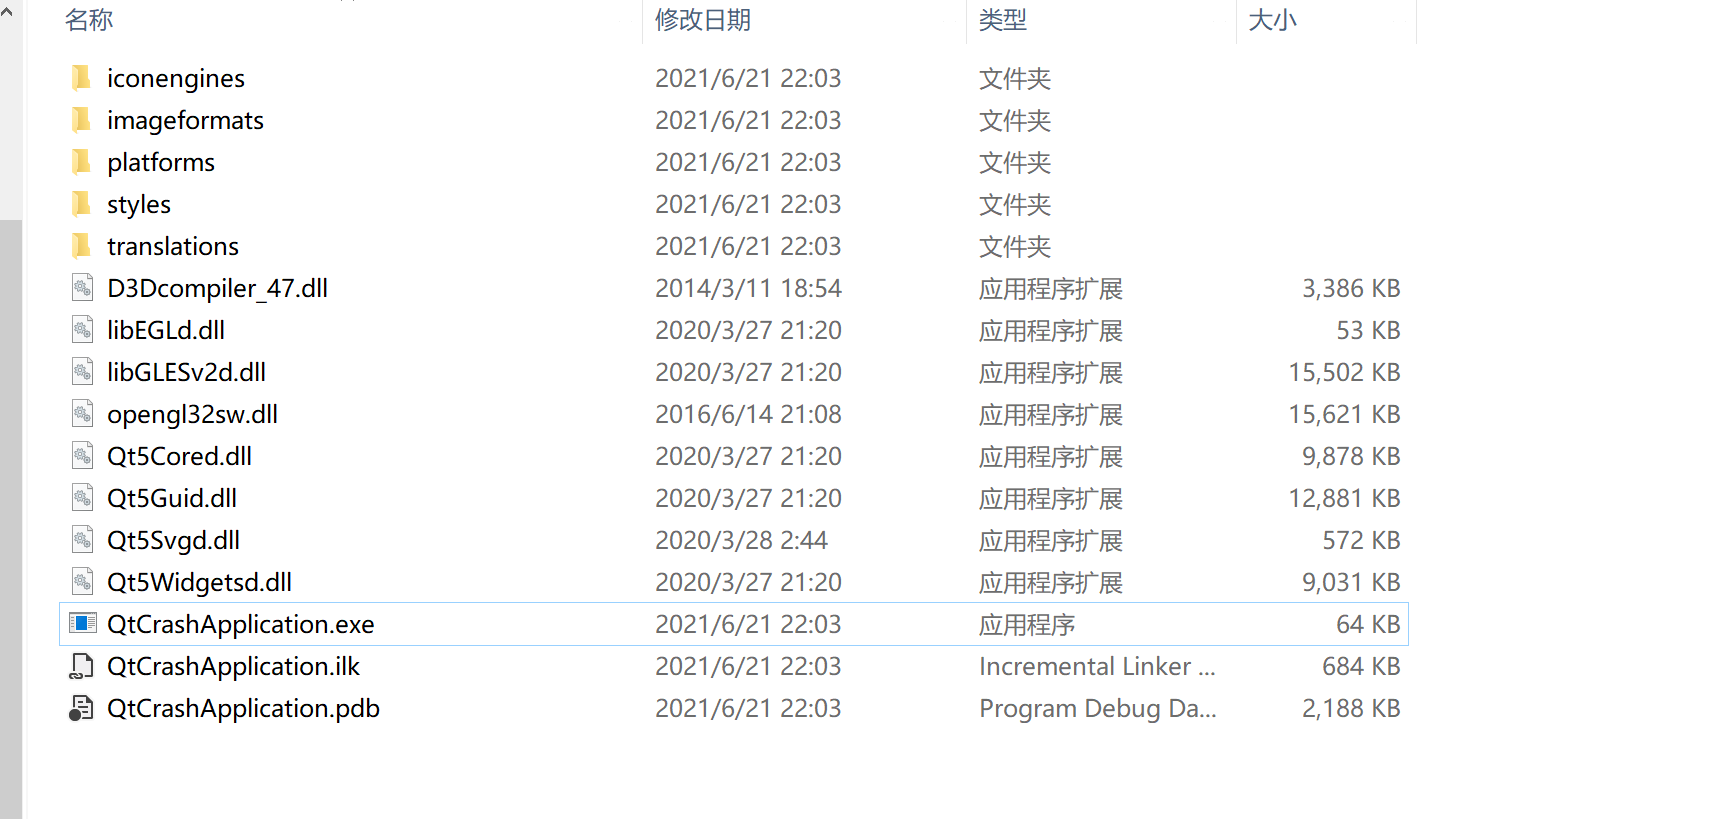
查看结果

查看结果

参考

std::lock_guard — C++最简单的线程安全锁(避免死锁)

std::lock_guard 简单用法

#include <iostream>
#include <thread>
#include <mutex>

using namespace std;

int g_count = 0;
mutex g_mutex;

void increment()
{
    lock_guard<mutex> lock(g_mutex); // 开启后g_count总是可以输出20000,否则会少于20000
    ++g_count;
    this_thread::sleep_for(chrono::microseconds(2));
}

void run(int times)
{
    for (int i = 0; i < times; i++)
    {
        increment();
    }
}

int main()
{

    thread th1(run, 10000);
    thread th2(run, 10000);

    th1.join();
    th2.join();

    cout << g_count;

    return 0;
}

直接使用lock容易不对称导致死锁

#include <iostream>
#include <thread>
#include <mutex>

using namespace std;

int g_count = 0;
mutex g_mutex;

int increment1()
{
    g_mutex.lock();
    this_thread::sleep_for(chrono::microseconds(1));
    g_count++;
    g_mutex.unlock();
    return 0;
}

int increment2()
{
    g_mutex.lock();
    this_thread::sleep_for(chrono::microseconds(1));
    if (g_count > 11000)
    {
        return 0;
    }
    g_count++;
    g_mutex.unlock();
    return 0;
}

void run1(int times)
{
    for (int i = 0; i < times; i++)
    {
        increment1();
    }
}

void run2(int times)
{
    for (int i = 0; i < times; i++)
    {
        increment2();
    }
}

int main()
{

    thread th1(run1, 10000);
    thread th2(run2, 10000);

    th1.join();
    th2.join();

    cout << g_count;

    return 0;
}

使用lock_guard避免死锁

#include <iostream>
#include <thread>
#include <mutex>

using namespace std;

int g_count = 0;
mutex g_mutex;

int increment1()
{
    lock_guard<mutex> lock(g_mutex);
    this_thread::sleep_for(chrono::microseconds(1));
    g_count++;
    return 0;
}

int increment2()
{
    lock_guard<mutex> lock(g_mutex);
    this_thread::sleep_for(chrono::microseconds(1));
    g_count++;
    if (g_count > 11000)
    {
        return 0;
    }
    return 0;
}

void run1(int times)
{
    for (int i = 0; i < times; i++)
    {
        increment1();
    }
}

void run2(int times)
{
    for (int i = 0; i < times; i++)
    {
        increment2();
    }
}

int main()
{

    thread th1(run1, 10000);
    thread th2(run2, 10000);

    th1.join();
    th2.join();

    cout << g_count;

    return 0;
}

防止list下标越界,同样适用于map,set,vector等

#include <iostream>
#include <thread>
#include <mutex>
#include <list>

using namespace std;

class MonitorList
{

private:
    mutex g_mutex;
    list<int> g_list = {};

public:
    void push()
    {
        lock_guard<mutex> lock(g_mutex); // 不加会导致程序异常
        this_thread::sleep_for(chrono::microseconds(1));
        g_list.push_back(0);
    }

    void pop()
    {
        lock_guard<mutex> lock(g_mutex); // 不加会导致程序异常
        this_thread::sleep_for(chrono::microseconds(1));
        for (auto it = g_list.begin(); it != g_list.end(); ++it)
        {
            if (*it % 2 == 0)
            {
                it = g_list.erase(it);
            }
        }
    }
    int size()
    {
        return g_list.size();
    }
};

MonitorList g_MonitorList;

int main()
{

    thread th1([](int n)
               {
                   for (int i = 0; i < n; i++)
                   {
                       g_MonitorList.push();
                   }
               },
               10000);

    thread th2([](int n)
               {
                   for (int i = 0; i < n; i++)
                   {
                       g_MonitorList.pop();
                   }
               },
               3000);

    thread th3([](int n)
               {
                   for (int i = 0; i < n; i++)
                   {
                       g_MonitorList.pop();
                   }
               },
               3000);
    th1.join();
    th2.join();
    th3.join();

    cout << g_MonitorList.size() << endl;

    return 0;
}

使用MSYS2+mingw+QT作为C++开发环境

下载msys2

在清华大学大学镜像站点https://mirrors.tuna.tsinghua.edu.cn/msys2/distrib/下载最新版32(i686)/64(x86_64)位系统msys2

下载后安装

pacman 的配置

msys2采用pacman管理软件包,修改pacman的软件源提高下载速度

编辑 /etc/pacman.d/mirrorlist.mingw32 ,在文件开头添加:

Server = https://mirrors.tuna.tsinghua.edu.cn/msys2/mingw/i686

编辑 /etc/pacman.d/mirrorlist.mingw64 ,在文件开头添加:

Server = https://mirrors.tuna.tsinghua.edu.cn/msys2/mingw/x86_64

编辑 /etc/pacman.d/mirrorlist.ucrt64 ,在文件开头添加:

Server = https://mirrors.tuna.tsinghua.edu.cn/msys2/mingw/ucrt64

编辑 /etc/pacman.d/mirrorlist.clang64 ,在文件开头添加:

Server = https://mirrors.tuna.tsinghua.edu.cn/msys2/mingw/clang64

编辑 /etc/pacman.d/mirrorlist.msys ,在文件开头添加:

Server = https://mirrors.tuna.tsinghua.edu.cn/msys2/msys/$arch

然后执行 pacman -Sy 刷新软件包数据即可。

pacman -Sy

安装开发环境

安装基本开发环境和常用工具

pacman -S  base-devel  git  wget  p7zip  perl ruby python

安装 32位 MinGW-w64

pacman -S  mingw-w64-i686-toolchain

安装 64位 MinGW-w64

pacman -S  mingw-w64-x86_64-toolchain

安装Qt5和Qt Creator

pacman -S mingw64/mingw-w64-x86_64-qt5 mingw64/mingw-w64-x86_64-qt-creator

参考

C++学习资料

电子书

纸质书

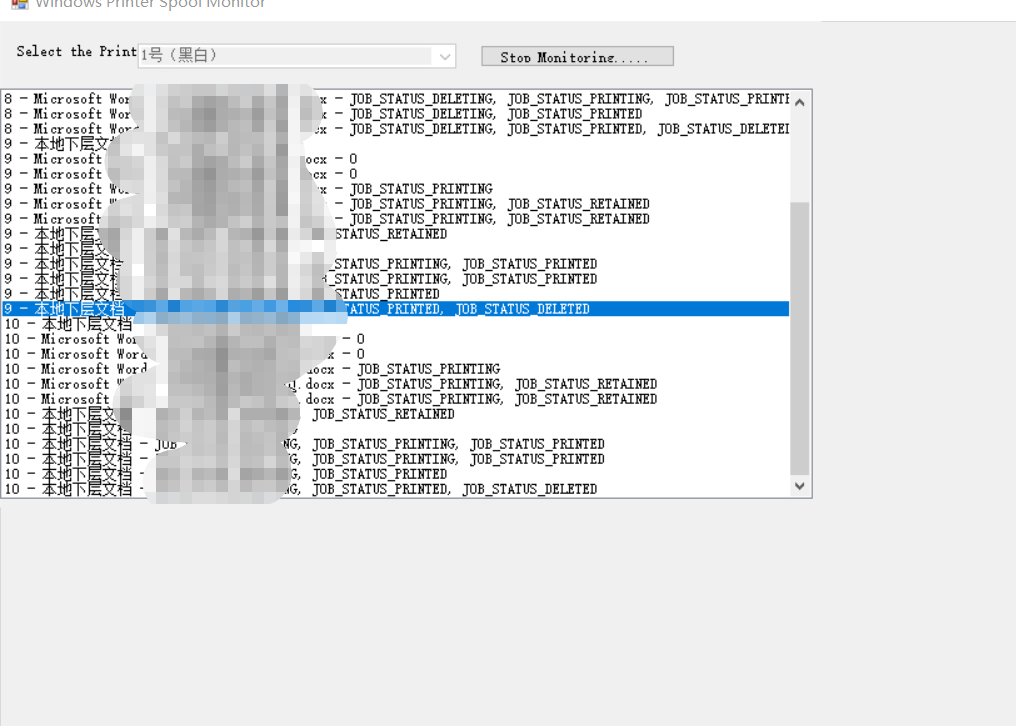
Windows自动化打印Office文件(Word,PDF,Excel,PPT等)

Windows(C++)

WPF(.net C#)

打印机自助打印代码(队列监控拦截+取消+状态获取)(附C#,C++,VB实现)

Monitor jobs in a printer queue (.NET)

https://www.codeproject.com/Articles/51085/Monitor-jobs-in-a-printer-queue-NET

c# 完整代码展示了如何获取打印机任务状态

file

Print Spooler API

https://docs.microsoft.com/zh-cn/windows/win32/printdocs/print-spooler-api

The Print Spooler API provides an interface to the print spooler for applications to manage printers and print jobs.

The Print Spooler API is used by an application as part of its programming and not directly by end users.

PrintQueue.GetPrintJobInfoCollection Method

Creates a collection that contains a PrintSystemJobInfo object for each job in the queue.

https://docs.microsoft.com/en-us/dotnet/api/system.printing.printqueue.getprintjobinfocollection?view=netframework-4.8

"Virtual Printer" or "Moving Printjobs" (C++)

https://cboard.cprogramming.com/windows-programming/108156-virtual-printer-moving-printjobs.html

Monitoring a Printer Queue from VB.NET

https://www.codeproject.com/Articles/3313/Monitoring-a-Printer-Queue-from-VB-NET

How to catch printer event in python

https://stackoverflow.com/questions/15748386/how-to-catch-printer-event-in-python

Printers and SafeHandles

https://www.codeproject.com/Articles/14690/Printers-and-SafeHandles

Printers and SafeHandles (Part 2)

https://www.codeproject.com/Articles/15084/Printers-and-SafeHandles-Part-2