// 初始化画布
set_time_limit(0);
$bg_file = Yii::getAlias('@frontend/web/test/wxbg.jpg');
$image = new \Imagick($bg_file);
// 写字
$font_file = Yii::getAlias('@frontend/web/test/msyhbd.ttc');
$draw = new \ImagickDraw();
$draw->setFillColor('#FF7F24');
$draw->setFont($font_file);
$draw->setFontSize(64);
$draw->setTextKerning(5);
$draw->setFontWeight(700);
$draw->setTextEncoding('UTF-8');
$metrics = $image->queryFontMetrics($draw, $name);
$draw->annotation(158, 50 + $metrics['ascender'], $name);
$image->drawImage($draw);
// 二维码
$qr_image = new \Imagick(Yii::getAlias('@frontend/web/test/qr.png'));
$qr_image->scaleImage(248, 248);
$image->compositeImage($qr_image, \Imagick::COMPOSITE_COPY, 254, 504);
// 返回
$response = Yii::$app->getResponse();
$response->format = Response::FORMAT_RAW;
$response->headers->set('Content-Type', 'image/jpeg');
$response->data = $image->getImageBlob();
return $response->send();
Yii2按需加载js,css文件,并自动加上时间戳
网上找遍了国内和国外的资料,没有能够为动态增加的文件加上时间戳的,进过分析Yii2源码,发现其实非常简单:
开启assetManager支持自动加上时间戳
修改main.php
'assetManager' => [
'appendTimestamp' => true,
],
视图层按需加载js,css
$bundle=AppAsset::register($this);
$bundle->js[]='js/windowview.js';
$bundle->css[]='css/robot.css';
Linux Shell生成随机数和随机字符串的5种方法
使用系统的 $RANDOM 变量
(CentOS、Ubuntu、MacOS 都支持,但只有5位数随机)
echo $RANDOM
24308
使用date +%s%N
(CentOS、Ubuntu支持,MacOS不支持纳秒 +%N)
date +%s%N
1557366636971317933
使用 /dev/random 和 /dev/urandom 随机文件
(CentOS、Ubuntu、MacOS 都支持)
head -20 /dev/urandom | cksum | cut -f1 -d " "
1053195602
使用 linux uuid
(CentOS、Ubuntu支持,MacOS不支持)
cat /proc/sys/kernel/random/uuid
bf05d41c-d69e-4247-8a79-baf3ab3f98ed
使用 openssl rand
(CentOS、Ubuntu支持、MacOS 都支持,需安装 openssl,推荐)
openssl rand -base64 128
Smt+jcaMSQ64Y4La8U6OUFl/TZWm+cKGtDqg+MRbKY6Zwp5iOzg3xoVZv+6NQv/W
UL+sqAHBhbTD1ZPgsyeloxTVLRV/SjU2O/mJAZoFLLZXtDhldl5lfgz3s3s28R+u
24TUNXnxGLGqQQxaudcF8Lhgq3LjDLQWzrgrTOIv1e0=
openssl rand -base64 128 | md5sum | cut -c1-32
2cbb48ea9bac4b08c2a9b4518e1faf79
openssl rand -hex 16
339a905406bb4ef3631dfa1ad67d8d6a
openssl rand -hex 8 | cksum
307618125 17
openssl rand -hex 8 | cksum | cut -c1-8
41657201
WSL Permission denied (publickey)解决办法
原因是因为WSL的ssh默认没有开启密码登录
设置SSH账号密码
sudo passwd *登录账户*
修改 /etc/ssh/sshd_config
PasswordAuthentication yes
重启sshd
sudo servcie ssh restart
WSL 服务自启动脚本
支持在Windows启动时启动WSL中的Linux服务.
安装
- 使用 git clone 到任意目录 (e.g
C:\wsl-autostart
)
git clone https://github.com/troytse/wsl-autostart
- 在注册表中加入启动项
- 在
HKEY_LOCAL_MACHINE\SOFTWARE\Microsoft\Windows\CurrentVersion\Run
下新增字符串项目 (e.gWSLAutostart
)
- 设定脚本的路径 (e.g
C:\wsl-autostart\start.vbs
)
使用
- 修改在WSL中
/etc/sudoers
文件,为需要自启动的服务指定为免密码. 如:
%sudo ALL=NOPASSWD: /etc/init.d/cron
%sudo ALL=NOPASSWD: /etc/init.d/ssh
%sudo ALL=NOPASSWD: /etc/init.d/nginx
%sudo ALL=NOPASSWD: /etc/init.d/postgresql
%sudo ALL=NOPASSWD: /etc/init.d/mysql
%sudo ALL=NOPASSWD: /etc/init.d/redis-server
%sudo ALL=NOPASSWD: /etc/init.d/php7.2-fpm
%sudo ALL=NOPASSWD: /etc/init.d/mongodb
- 修改
commands.txt
文件指定需要自启动的服务. 如:
/etc/init.d/mysql
/etc/init.d/postgresql
/etc/init.d/redis-server
/etc/init.d/php7.2-fpm
/etc/init.d/nginx
/etc/init.d/ssh
/etc/init.d/cron
/etc/init.d/mongodb
来源:WSL服务自启动脚本
yii gridview 使用target=”_blank”无效
解决办法是设置format为raw:
[
'attribute' => 'attribute',
'format' => 'raw',
'value' => function ($model, $key, $index, $column) {
return Html::a($model->title, ['view', 'id' => $model->id], ['target' => '_blank']);
},
],
Yii2设置变量到布局layout
通过全局params配置
Yii::$app->params['myVar']
通过session
Yii::app()->session['myvar']
或者通过Flash Message
通过控制器传递变量方式
首先,需要再控制器添加参数
class SiteController extends CController {
public $myvar;
//...
然后在layout/main.php获取控制器变量
$this->context->myvar
Yii::$app->controller->myvar
精品数据库(省市区县带拼音行政区划、大学、IP地址、农历、等)
行政区划-数据库
全国行政区划,省市区镇四级,包含名称、完整名称、经纬度、区号、邮编、行政区划代码、拼音。
使用说明
area.xlsx Excel文件数据
area.sql MySQL脚本
area.psc Navicat for MySQL备份文件
area.nb3 Navicat Premium备份文件
数据来源
高德API
民政部官网
中国邮政官网
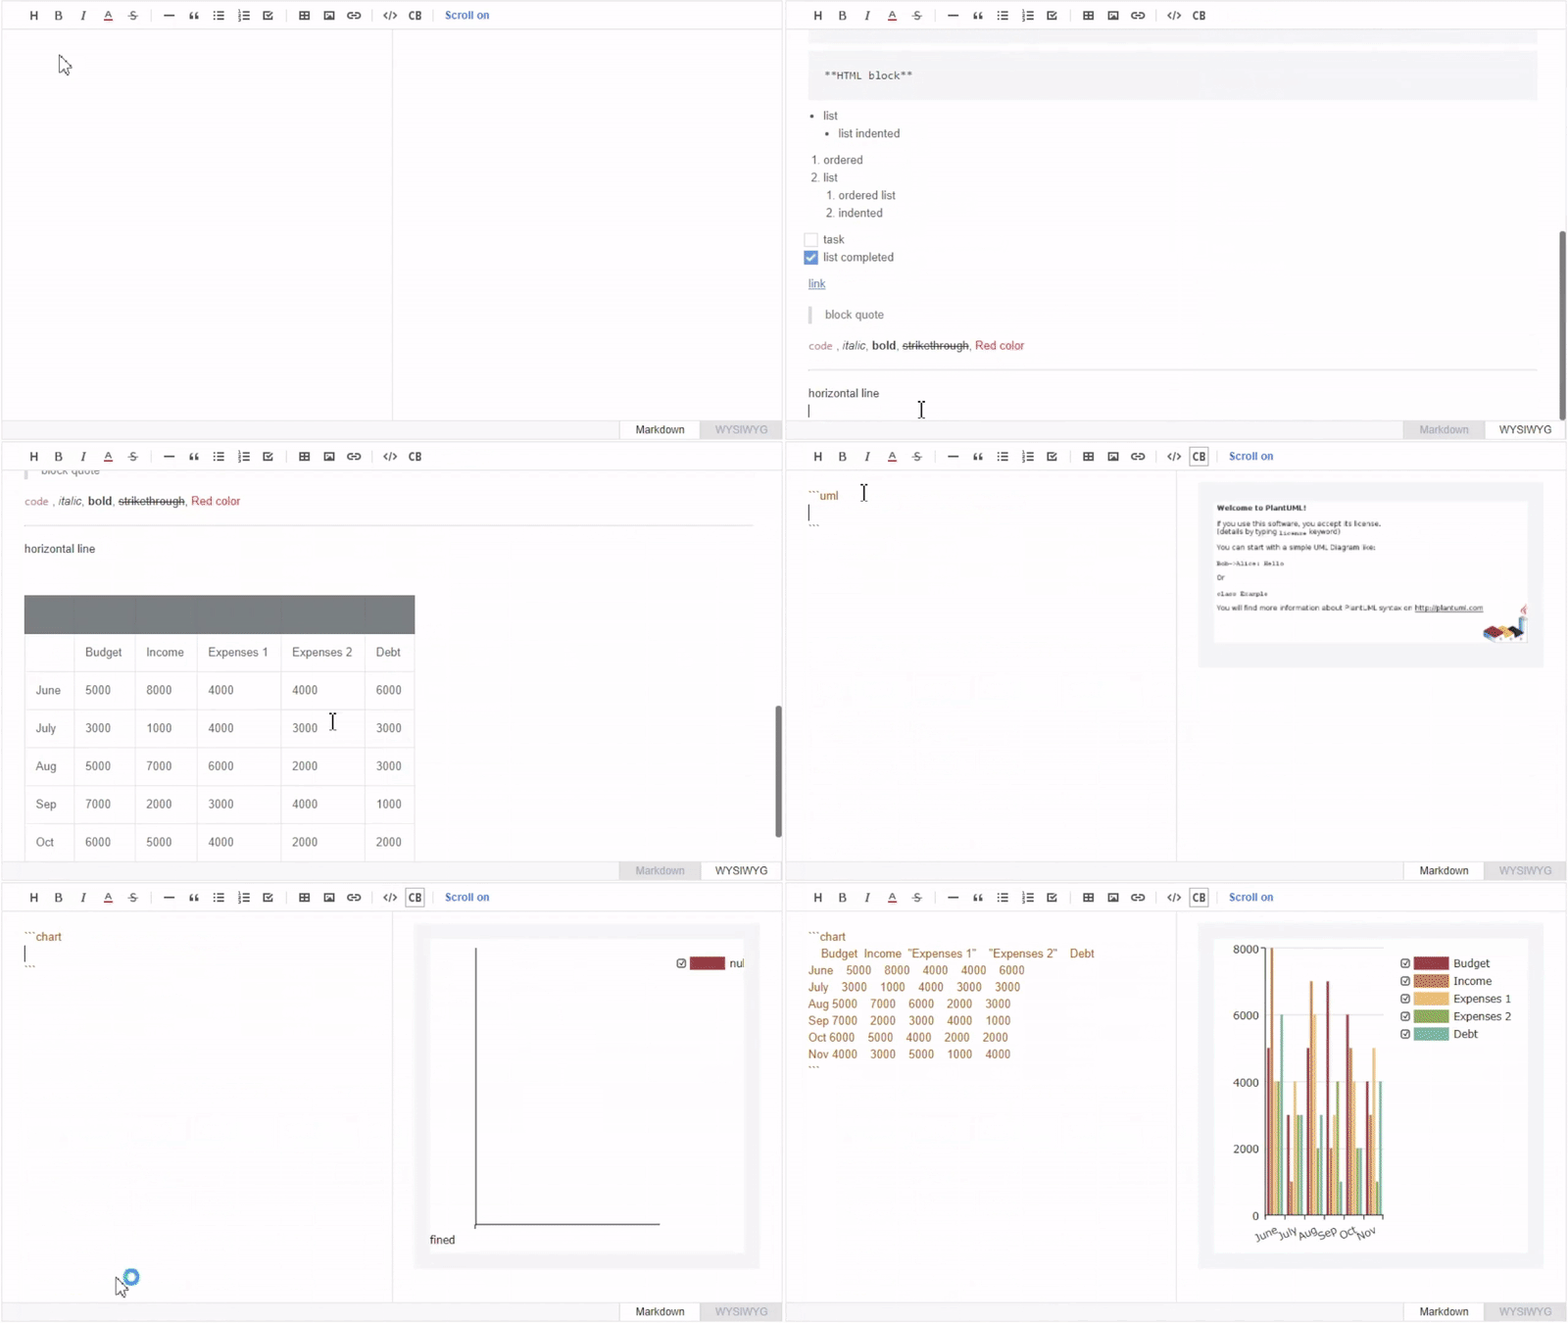
HTML Markdown 所见即所得(WYSIWYG) Editor
tui.edito
Markdown WYSIWYG Editor. GFM Standard + Chart & UML Extensible. http://ui.toast.com/tui-editor
简洁,速度快
editor.md
The open source embeddable online markdown editor (component). https://pandao.github.io/editor.md/
功能强大,国人开发
C#实现自动打印PDF
采用PDFRender4NET
//打印机设置
PrinterSettings settings = new PrinterSettings();
settings.PrinterName = printername;
settings.PrintToFile = false;
settings.Copies = 1;
settings.PrintRange = PrintRange.AllPages;
//设置纸张大小(可以不设置取,取默认设置)
PaperSize ps = new PaperSize("Your Paper Name",595,842);
ps.RawKind = 9; //如果是自定义纸张,就要大于118
//打印设置
PDFRender.Printing.PDFPrintSettings pdfPrintSettings = new PDFRender.Printing.PDFPrintSettings(settings);
pdfPrintSettings.AutoRotate = false; //自动旋转
pdfPrintSettings.BitmapPrintResolution = 560; //图片打印精度
pdfPrintSettings.PaperSize = ps; //纸张尺寸
pdfPrintSettings.PageScaling = PDFRender.Printing.PageScaling.FitToPrinterMarginsProportional;
pdfFile.Print(pdfPrintSettings);
代码详见: https://github.com/HiRaygo/DocumentPrint/blob/master/PdfPrint.cs
采用SumatraPDF或Acrobat Reader方案
public static PrintEngine SumatraPDF = new PrintEngine("Sumatra PDF Reader",
((printerName, filePath, documentName) =>
{
string app = Path.Combine(Program.localPath, "SumatraPDF.exe");
string args = string.Format("-silent -exit-on-print -print-to \"{0}\" \"{1}\"", printerName, filePath);
Process p = new Process();
p.StartInfo = new ProcessStartInfo()
{
CreateNoWindow = true,
WindowStyle = ProcessWindowStyle.Hidden,
FileName = app,
Arguments = args
};
//if (User.isNetworkService())
//{
// p.StartInfo.UserName = Program.config.serviceLogin;
// p.StartInfo.Password = tools.secureString(tools.Decrypt(Program.config.servicePass));
// p.StartInfo.Domain = Program.config.serviceDomain;
// p.StartInfo.LoadUserProfile = true;
// p.StartInfo.UseShellExecute = false;
//}
p.Start();
})){};
/// <summary>
/// Print via external programm Acrobat Reader
/// </summary>
public static PrintEngine AcrobatReader = new PrintEngine("Acrobat Reader",
((printerName, filePath, documentName) =>
{
string app = Registry.LocalMachine.OpenSubKey(
@"SOFTWARE\Microsoft\Windows\CurrentVersion" +
@"\App Paths\AcroRd32.exe"
).GetValue("").ToString()
;
string args = string.Format("/h /t \"{0}\" \"{1}\"", filePath, printerName);
Process p = new Process();
p.StartInfo = new ProcessStartInfo()
{
CreateNoWindow = true,
WindowStyle = ProcessWindowStyle.Hidden,
FileName = app,
Arguments = args
};
//if (User.isNetworkService())
//{
// p.StartInfo.UserName = Program.config.serviceLogin;
// p.StartInfo.Password = tools.secureString(tools.Decrypt(Program.config.servicePass));
// p.StartInfo.Domain = Program.config.serviceDomain;
// p.StartInfo.LoadUserProfile = true;
// p.StartInfo.UseShellExecute = false;
//}
p.Start();
})){};
代码详见: https://github.com/RepairShopr/AutoPrintr-win/blob/master/AutoPrintr/modules/PrintEngines.cs