set $match_host '0';
set $match_url '0';
if ($host ~ "192.168.1.105") {
    set $match_host '1';
}
if ($request_uri ~* "test") {
    set $match_url '${match_host}1';
}
if ($match_url = '11'){
   return 404;
}什么是全能程序员?全能程序员怎么来的?
最近看到阮一峰的《全能程序员 vs 特长程序员》提到观点,结合自身经历,发表一点不同的看法。
-
“软件行业"全能程序员"的出路,明显不如"特长程序员"”
-
"全能程序员"在这个行业是不受待见的,被视为"万金油"。
什么是全能程序员?全能程序员怎么来的?
一个程序员,如果长期在某一领域工作,可能会发现原有的知识不够用,这时候需要学习新的知识,恰好你乐意去学习,你也能挤出活创造时间和机会,然后你就去学习并掌握了,你运用学习到知识,在使用的过程中你逐步发现他们的原理,了解新知识与旧知识的联系和异同,久而久之,你掌握的新知识越来越多,能解决的问题越来越多,虽然随着时间的迁移许多新知识也变成了旧知识,但是在别人眼里,你成了他们眼中各方面问题都能解决的“全能程序员”。所以:
-
全能程序员的定义应该是:在某一领域,能够解决大多数别人不能解决问题,而不是看似都懂实际则浅尝辄止。
-
全能程序员是怎么来的:全能程序员是遇到问题后不断追根究底,在别人已经停止研究情况下,仍然不断学习和探索,直到到最终解决问题或者找到问题的最优解,在这个过程中不断积累成长起来的。
全能程序员的优势
-
成为全能程序员是很多职位的最佳途径,如:CTO, devops, 架构师
-
更好的解决问题的办法:如果将程序员比做木工,在全能手里,永远不止有锤子,全能程序员不可能只会干钉钉子的活,他们抛光会用狍子,打眼会用锉子,电锯和电转也是最先掌握的
-
最快找到问题的解决办法:他们清楚整件事情的来龙去脉和原理,找问题不用开IDE,在心里就能完成DEBUG和需求分析,开IDE只是为了验证和最终解决问题
-
最高效的解决问题方式:他们从架构上,组织上找到最有效率的协作方法,他们明白每多一道沟通就是浪费
-
最节省资源:好比电脑CPU没在空耗,老板付一份工资找了一个需要几个人干的活
全能程序员的缺陷
-
个人的精力是有限的,你不能一个解决所有问题,你仍然需要一个靠谱的团队,电脑可以不休息人需要休息
-
思维切换需要时间,电脑可以多任务人往往不可以
-
你个人的能力会被其他人平均,老板可能愿意付你2倍工资,往往没法付你10倍工资,即使你是10倍程序员
-
你需要付出的比别人多,除非你乐意,否则没法坚持
全能程序员/全能非程序员的现实例子
全能非程序员的例子:
- 毛泽东不仅会打仗,诗的气势普通人恐怕也很难达到;
- 本杰明富兰克林不仅能当好总统还会发明创造;
- 达芬奇不仅能画好蛋;
- 马斯克创Paypal、造车、造火箭和造星链。。。
全能程序员的例子:
- 几乎所有编程语言发明者都精通其他一门到多门语言
- 合格的devops或者架构师都精通一门语言+数据库+非关系存储+linux+分布式
事情的本质
- Python、C++是全能的,PHP、Go、R、Lisp是特长的,他们都是成功的
- 罗技、格力专注成功,联想、华为、小米、通用不那么专注也很成功
- 马云不会编程能带领阿里成为技术性领先的公司,马化腾、王兴、张小龙搞技术的也不会因此管理和产品能力就差一点
总结:全能和特长本不矛盾,各阶段选取合理的发展方向。作为技术人学习好英语,掌握几门编程语言、几种数据库、学习下devops,学习管理、产品和运营,先成为一个领域专家,然后架构师,CTO,再自己创立公司,仍然不失为一条明确的路径。
linux(ubuntu/manjaro)让JetBrains(Phpstorm/Pycharm/Intellij)支持ibus中文
目前的解决方法:
- 下载这个https://cache-redirector.jetbrains.com/intellij-jbr/jbr_jcef-11_0_7-linux-x64-b765.53.tar.gz JRE 并解压。
- 然后Help | Find Action在IDE主菜单中点击,输入Choose Boot Java Runtime for the IDE,回车,然后点击New下拉,向下滚动,找到Add Custom Runtime选项,选择这个解压后的JRE运行,重启IDE。
- 对于 2020.3.x 版本,您需要使用此步骤切换到此 JRE:https ://www.jetbrains.com/help/idea/2020.3/switching-boot-jdk.html#switch-jdk
- 或者尝试使用上述步骤切换到 OpenJDK 11(AdoptJDK 11、OracleJDK 11)。
参考
Ubuntu下PHP 7和PHP 8多版本共存以及composer指定版本
修改更新源
sudo add-apt-repository ppa:ondrej/php
sudo apt update
sudo apt upgrade
安装PHP7以及常用扩展
sudo apt install php7.4-common php7.4-cgi php7.4-gd php7.4-mysql php7.4-xml php7.4-cli php7.4-json php7.4-sqlite3 php7.4-xmlrpc php7.4-bcmath php7.4-enchant
php7.4-opcache php7.4-readline php7.4-xsl php7.4-bz2 php7.4-curl  php7.4-fpm php7.4-mbstring php7.4-pgsql php7.4-tidy php7.4-zip
安装PHP8以及常用扩展
sudo apt install php8.0-common php8.0-cgi php8.0-gd php8.0-mysql php8.0-xml php8.0-cli php8.0-sqlite3 php8.0-xmlrpc php8.0-bcmath php8.0-enchant php8.0-opcache php8.0-readline php8.0-xsl php8.0-bz2 php8.0-curl php8.0-fpm php8.0-mbstring php8.0-pgsql php8.0-tidy php8.0-zipcomposer安装以及使用
安装composer
php -r "copy('https://install.phpcomposer.com/installer', 'composer-setup.php');"
php composer-setup.php
php -r "unlink('composer-setup.php');"
sudo mv composer.phar /usr/local/bin/composer
配置composer使用镜像
composer config -g repo.packagist composer https://mirrors.aliyun.com/composer/运行composer时指定PHP版本
php8.0 /usr/local/bin/composer
php7.4 /usr/local/bin/composer
alias composer7='php7.4 /usr/local/bin/composer'
alias composer8='php8.0 /usr/local/bin/composer'
使用symfony composer以及.php_version文件指定PHP版本
查看本地所有PHP版本
symfony local:php:list显示结果
┌─────────┬────────────┬────────────┬─────────┬─────────┬─────────┬─────────┐
│ Version │ Directory  │  PHP CLI   │ PHP FPM │ PHP CGI │ Server  │ System? │
├─────────┼────────────┼────────────┼─────────┼─────────┼─────────┼─────────┤
│ 7.4.14  │ /usr/local │ bin/php    │         │         │ PHP CLI │ *       │
│ 7.4.16  │ /usr       │ bin/php7.4 │         │         │ PHP CLI │         │
└─────────┴────────────┴────────────┴─────────┴─────────┴─────────┴─────────┘指定symfony composer使用PHP7
echo 7 > .php-version指定symfony composer使用PHP8
echo 8 > .php-version使用symfony composer安装或者更新包
symfony composer install参考
Qt Windows CMakeLists.txt 注意事项
改为32位GUI启动
默认会出现命令行黑窗口,需要添加图形界面类型
if(WIN32)
    set(GUI_TYPE WIN32)
elseif(APPLE)
    set(GUI_TYPE MACOSX_BUNDLE)
endif()

add_executable(${CMAKE_PROJECT_NAME} ${GUI_TYPE} ${SRC} ${RES})
为QT应用添加管理员权限
set_target_properties(${PROJECT_NAME} PROPERTIES LINK_FLAGS "/MANIFESTUAC:\"level='requireAdministrator' uiAccess='false'\"")解决复制dll错误问题
第一次复制成功后,注释以下代码
    foreach (QT_LIB ${REQUIRED_LIBS})
        add_custom_command(TARGET ${PROJECT_NAME} POST_BUILD
                COMMAND ${CMAKE_COMMAND} -E copy
                "${QT_INSTALL_PATH}/bin/Qt${QT_VERSION}${QT_LIB}${DEBUG_SUFFIX}.dll"
                "$<TARGET_FILE_DIR:${PROJECT_NAME}>")
endforeach (QT_LIB)设置CMAKE_PREFIX_PATH路径
set(CMAKE_PREFIX_PATH "D:\\Qt\\Qt5.12.9\\5.12.9\\msvc2017\\")捕获Qt Crash全图教程
关键点
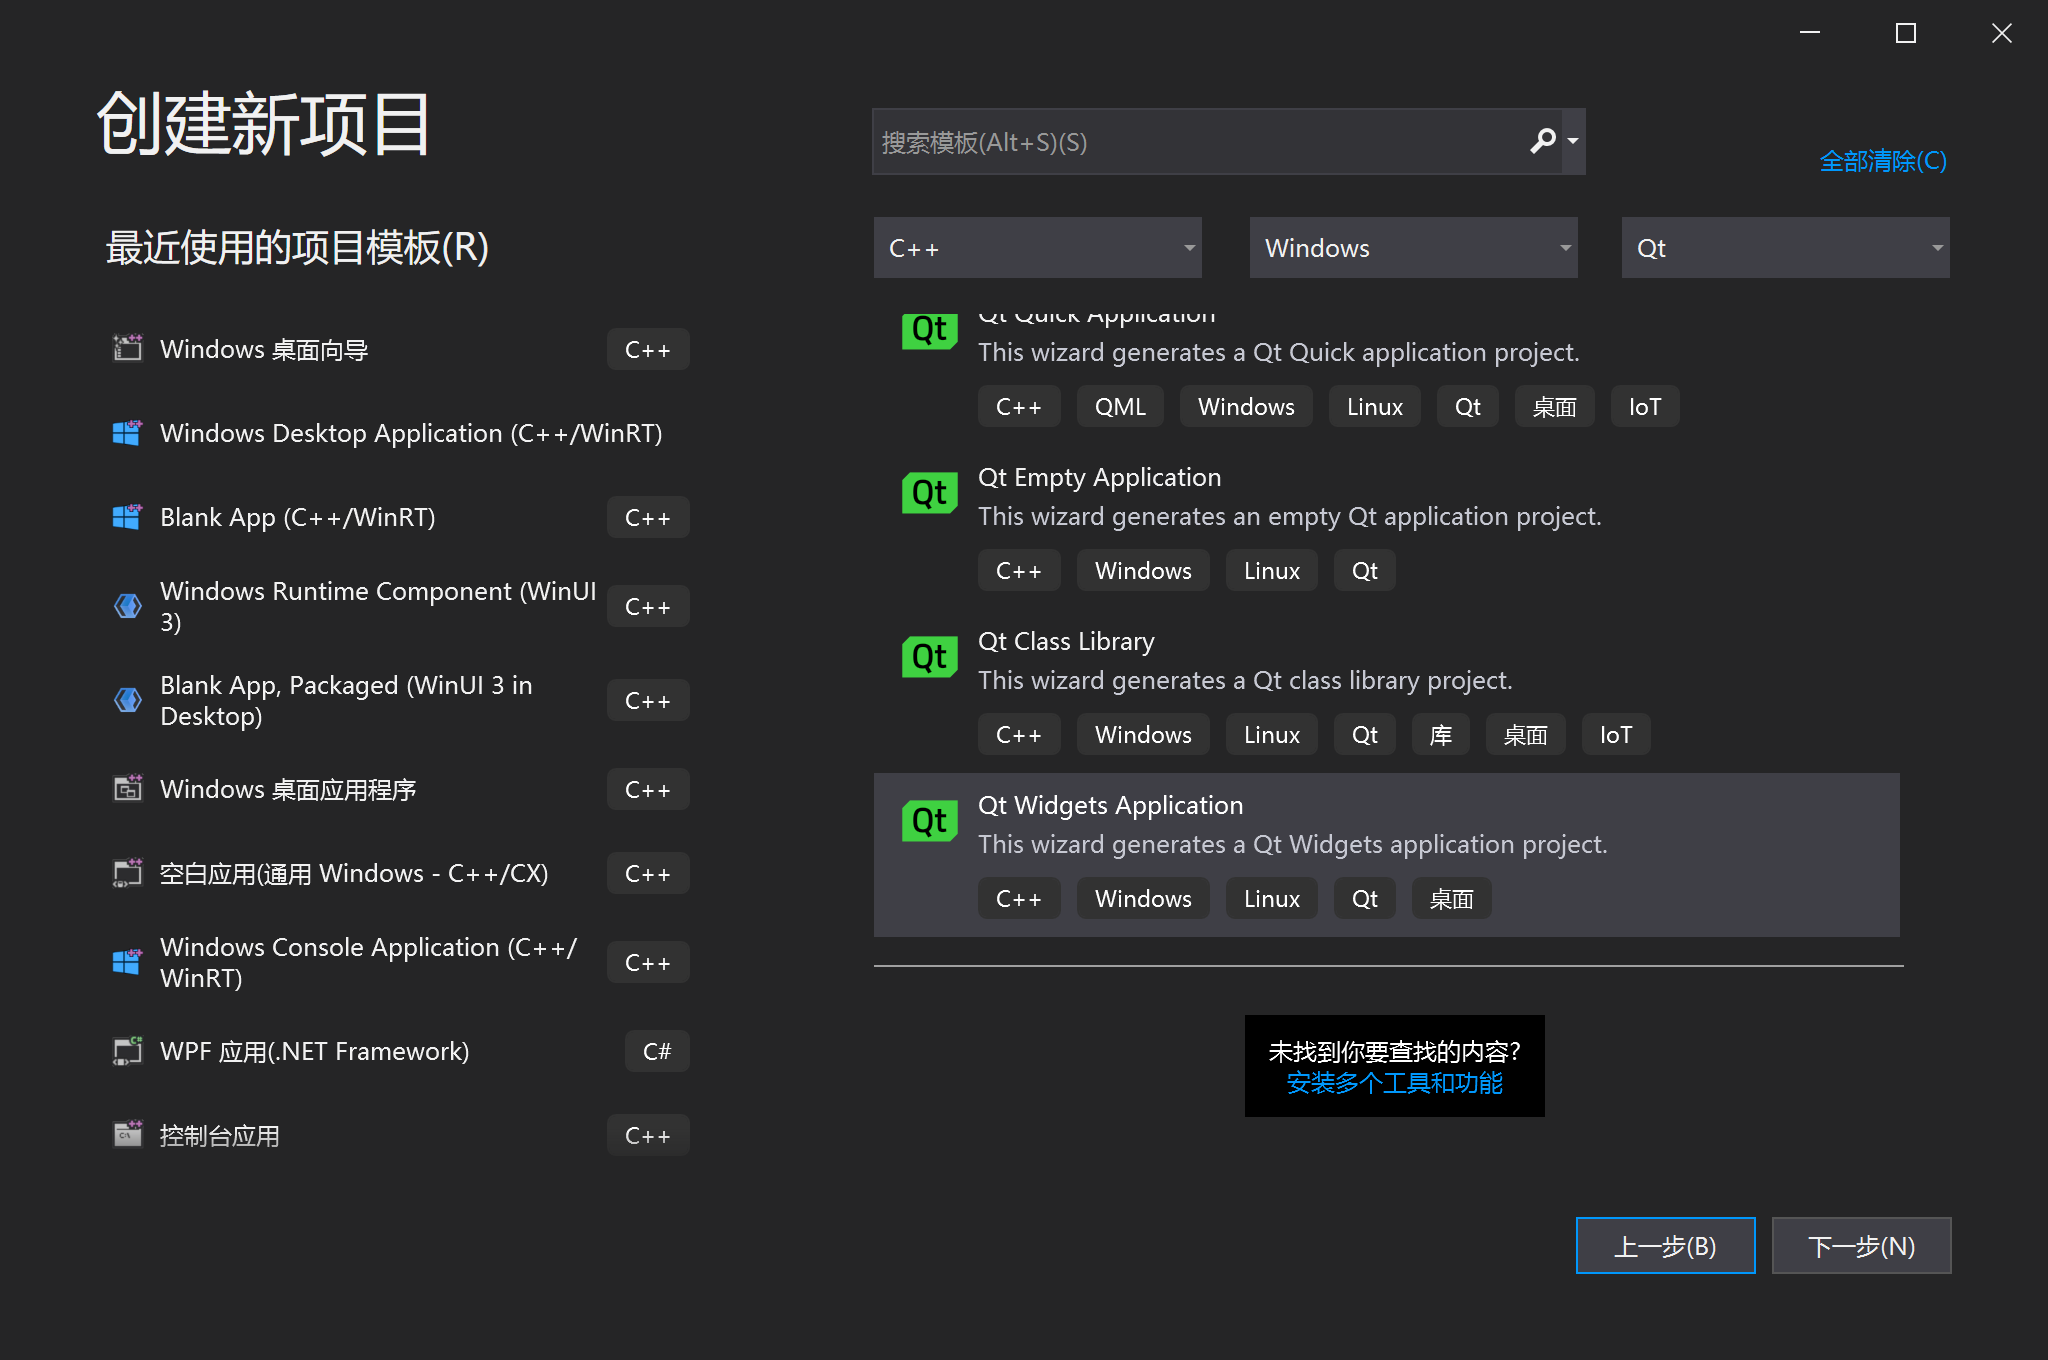
- 在main.cpp引入SetUnhandledExceptionFilter程序奔溃时生成dmp文件(代码)
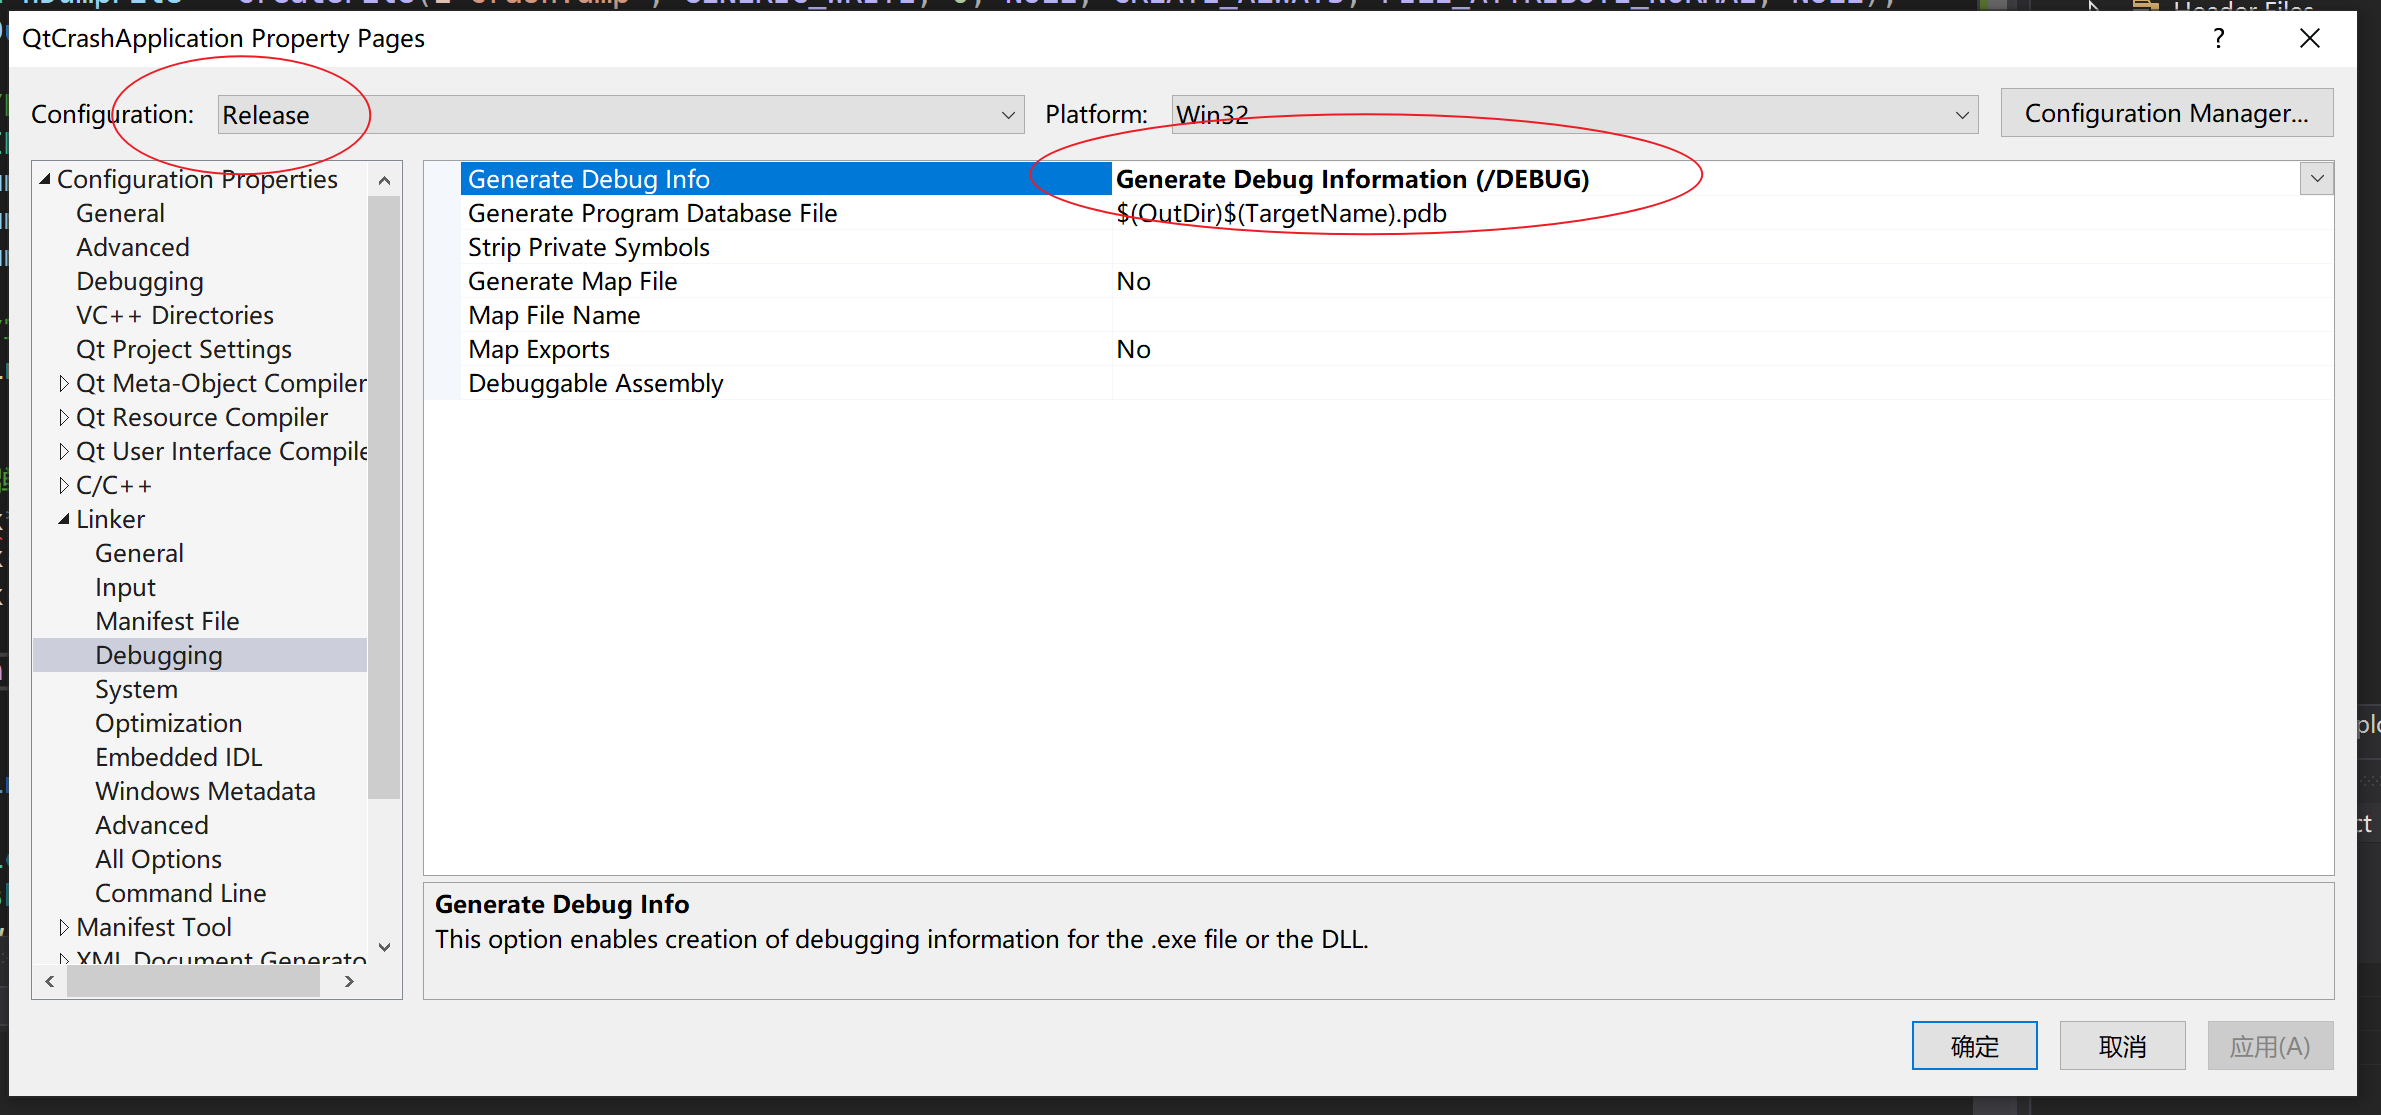
- Build release时包含debug信息(图)
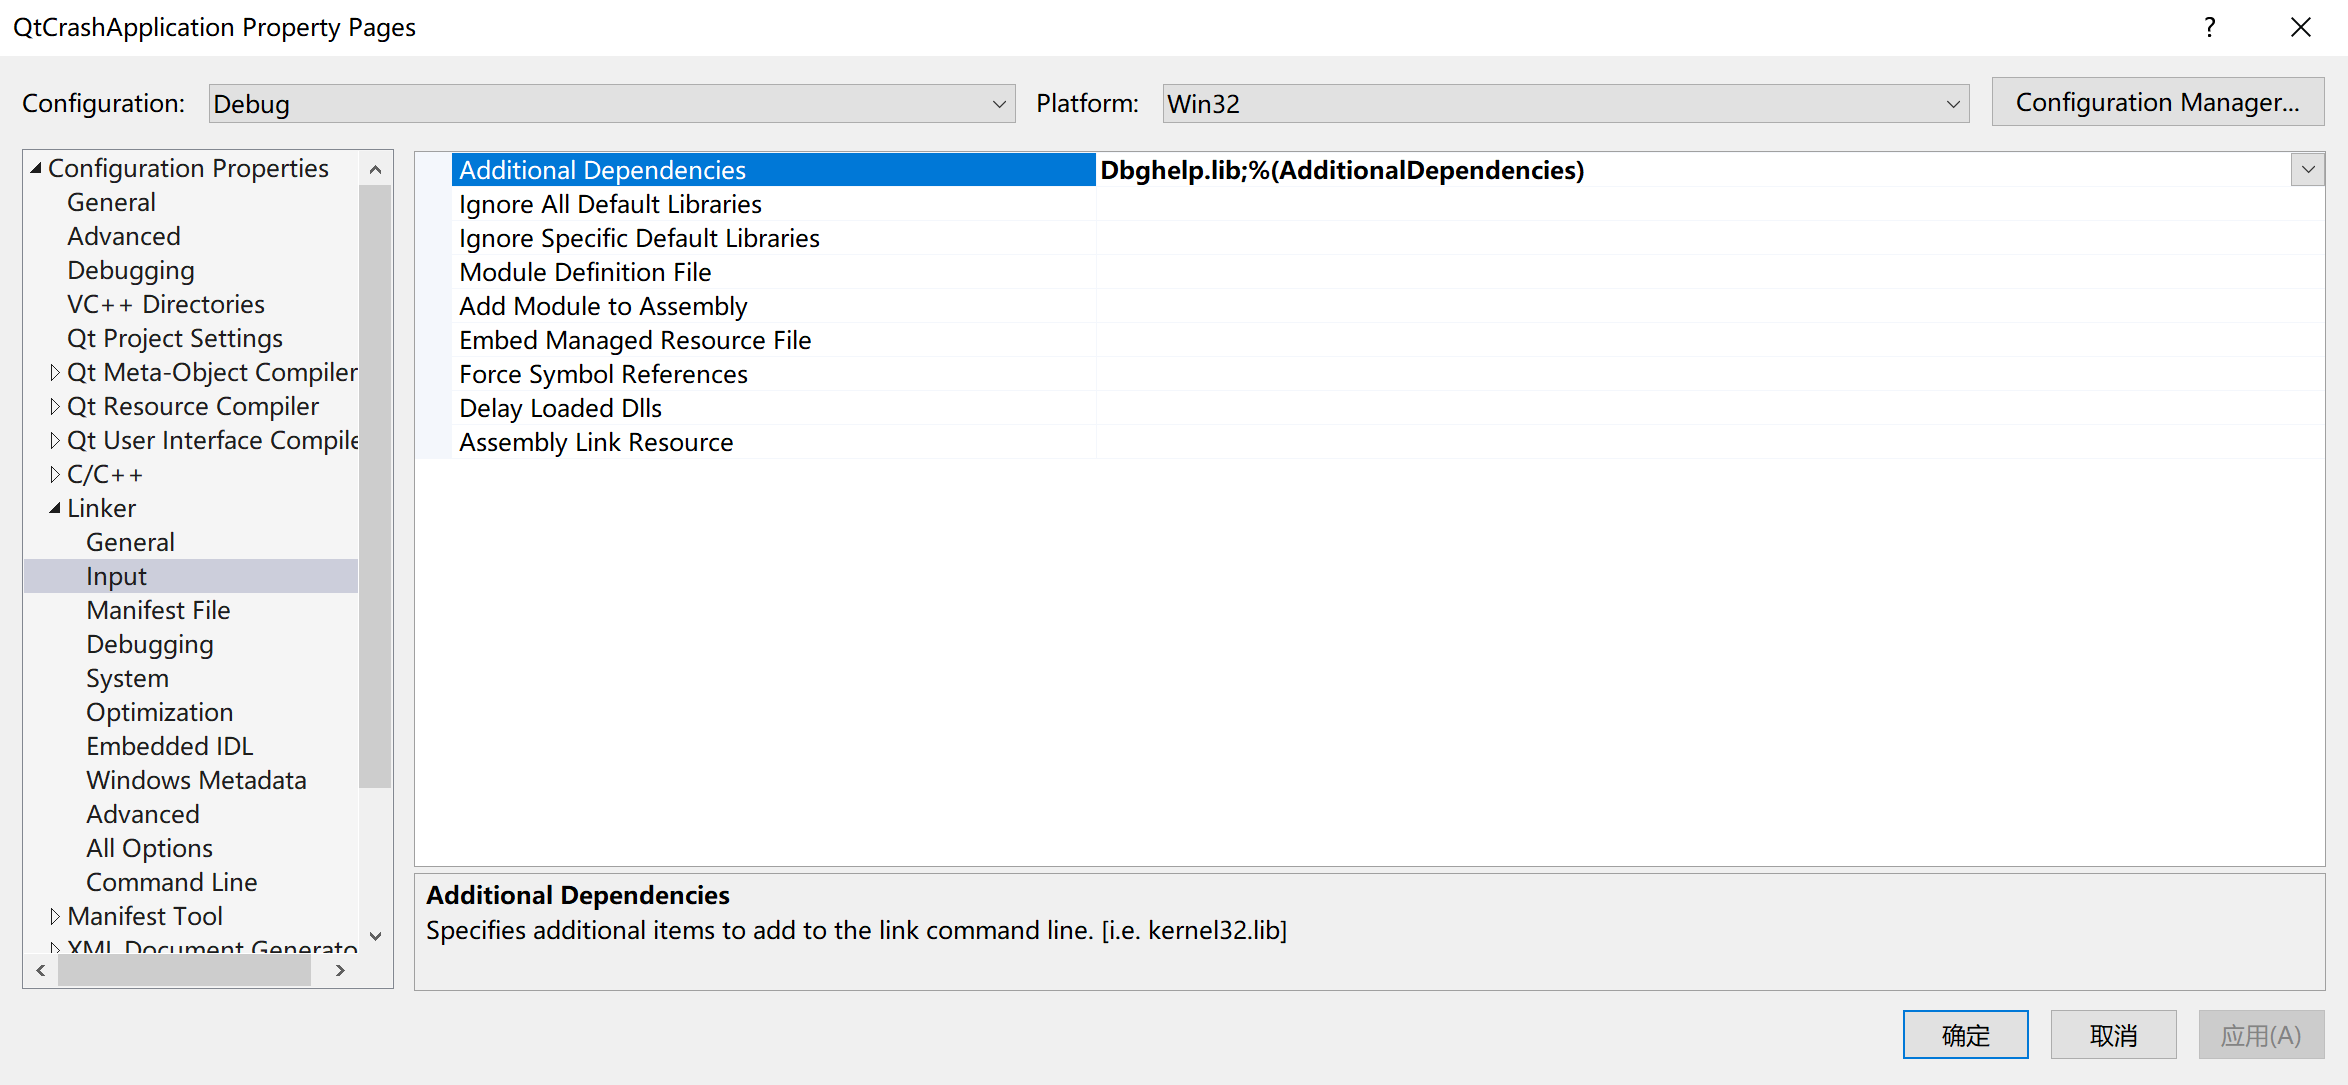
- Link dbghelp.lib库(图)
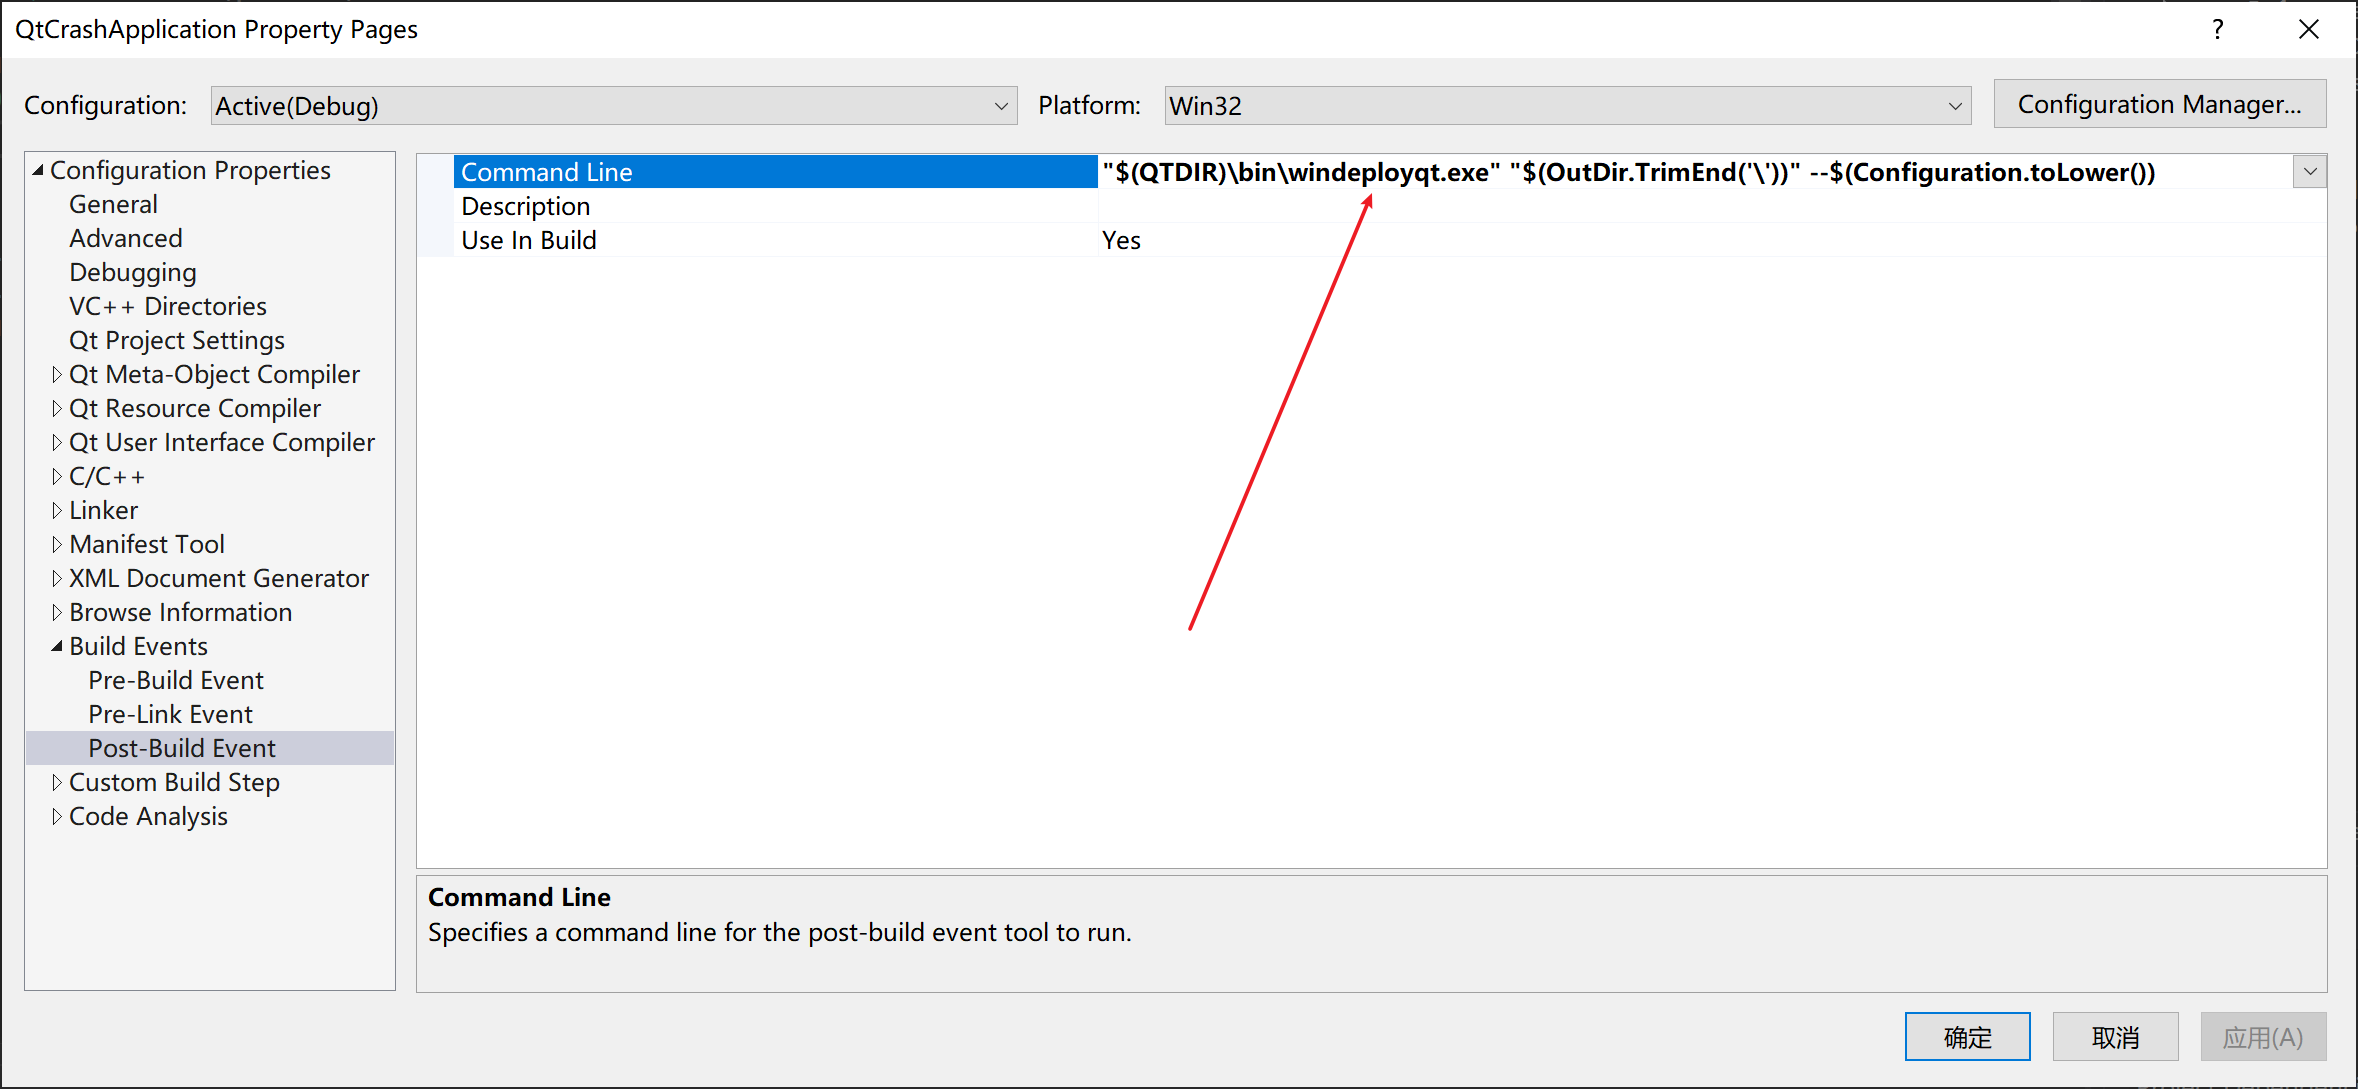
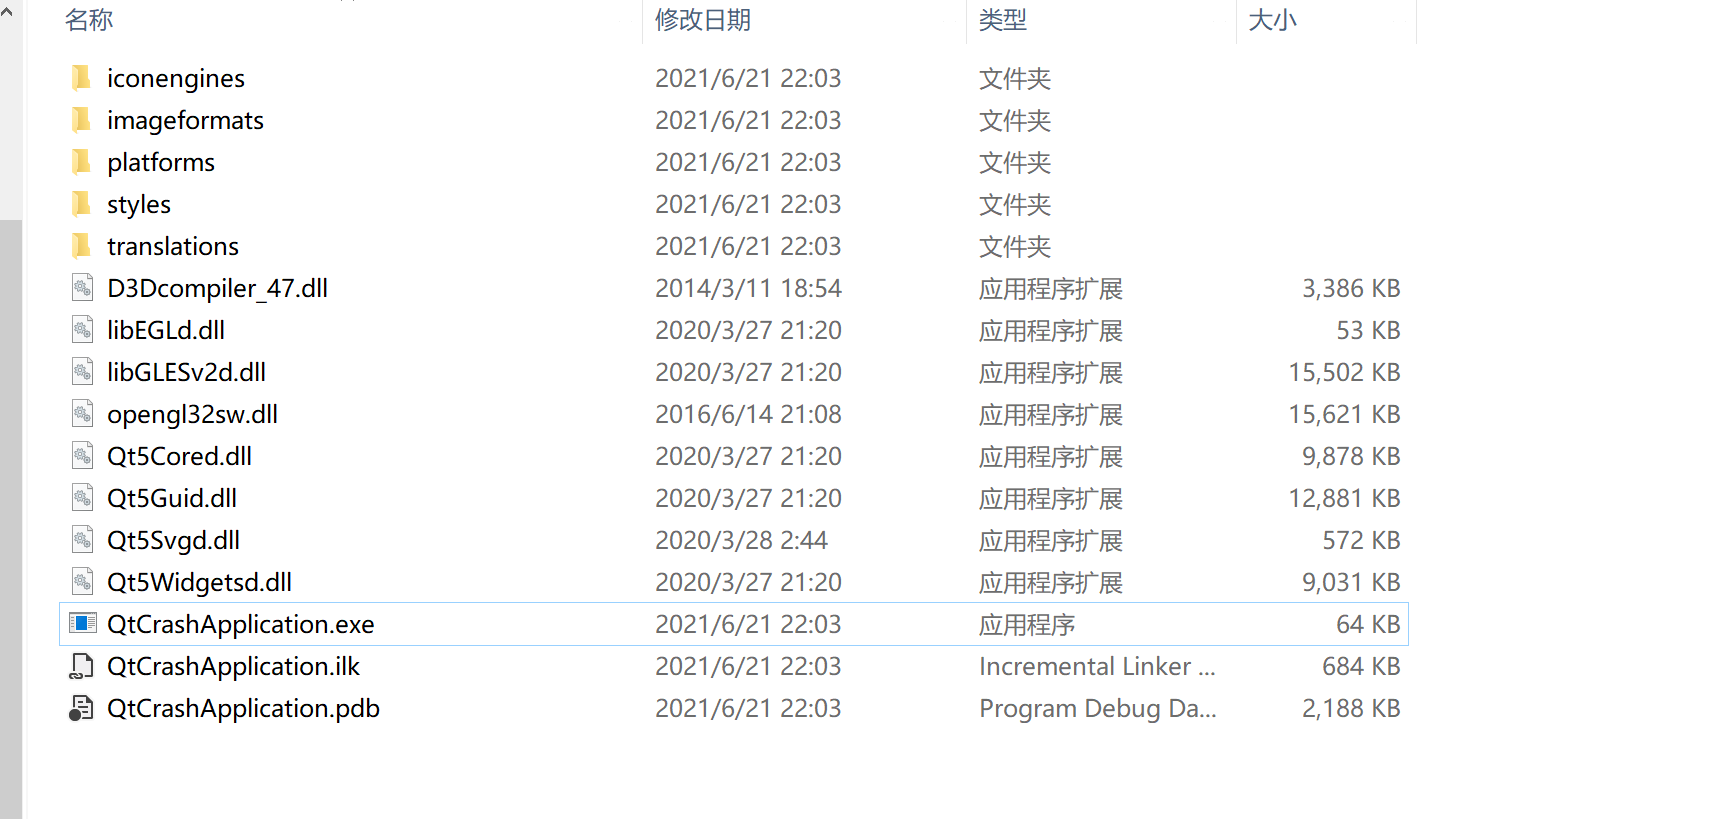
- Build post自动复制qt依赖库(图)
Qt捕获Crash关键代码
main.cpp
#include <QtWidgets/QApplication>
#include <QMessageBox>
#include <QDateTime>
#include <QDir>
#include <QDebug>
#include "QtCrashApplication.h"
#include "main.h"

#ifdef Q_OS_WIN
#include <Windows.h>
#include <DbgHelp.h>
#endif

#ifdef Q_OS_WIN
static LONG WINAPI exceptionCallback(struct _EXCEPTION_POINTERS* exceptionInfo)
{
    QCoreApplication* app = QApplication::instance();

    QString savePath = app->applicationDirPath() + "dump/";
    qDebug() << "save path :" << savePath;
    QDir dir(savePath);
    if (!dir.exists() && !dir.mkpath(savePath)) {
        app->exit(E_UNEXPECTED);
        return EXCEPTION_EXECUTE_HANDLER;
    }

    savePath.append("assit_");
    savePath.append(QDateTime::currentDateTime().toString("yyyyMMddhhmmsszzz"));
    savePath.append(".dmp");

    HANDLE dump = CreateFileW(savePath.toStdWString().c_str(), GENERIC_WRITE,
        0, NULL, CREATE_ALWAYS, FILE_ATTRIBUTE_NORMAL, NULL);
    if (INVALID_HANDLE_VALUE == dump) {
        app->exit(E_UNEXPECTED);
        return EXCEPTION_EXECUTE_HANDLER;
    }

    MINIDUMP_EXCEPTION_INFORMATION miniDumpExceptionInfo;
    miniDumpExceptionInfo.ExceptionPointers = exceptionInfo;
    miniDumpExceptionInfo.ThreadId = GetCurrentThreadId();
    miniDumpExceptionInfo.ClientPointers = TRUE;
    DWORD idProcess = GetCurrentProcessId();
    MiniDumpWriteDump(GetCurrentProcess(), idProcess, dump,
        MiniDumpNormal, &miniDumpExceptionInfo, NULL, NULL);

    CloseHandle(dump);

    app->exit(E_UNEXPECTED);
    return EXCEPTION_EXECUTE_HANDLER;
}
#endif

int main(int argc, char* argv[])
{
    QApplication a(argc, argv);

#ifdef Q_OS_WIN
    SetUnhandledExceptionFilter(exceptionCallback);
#endif

    QtCrashApplication w;
    w.show();
    return a.exec();
}
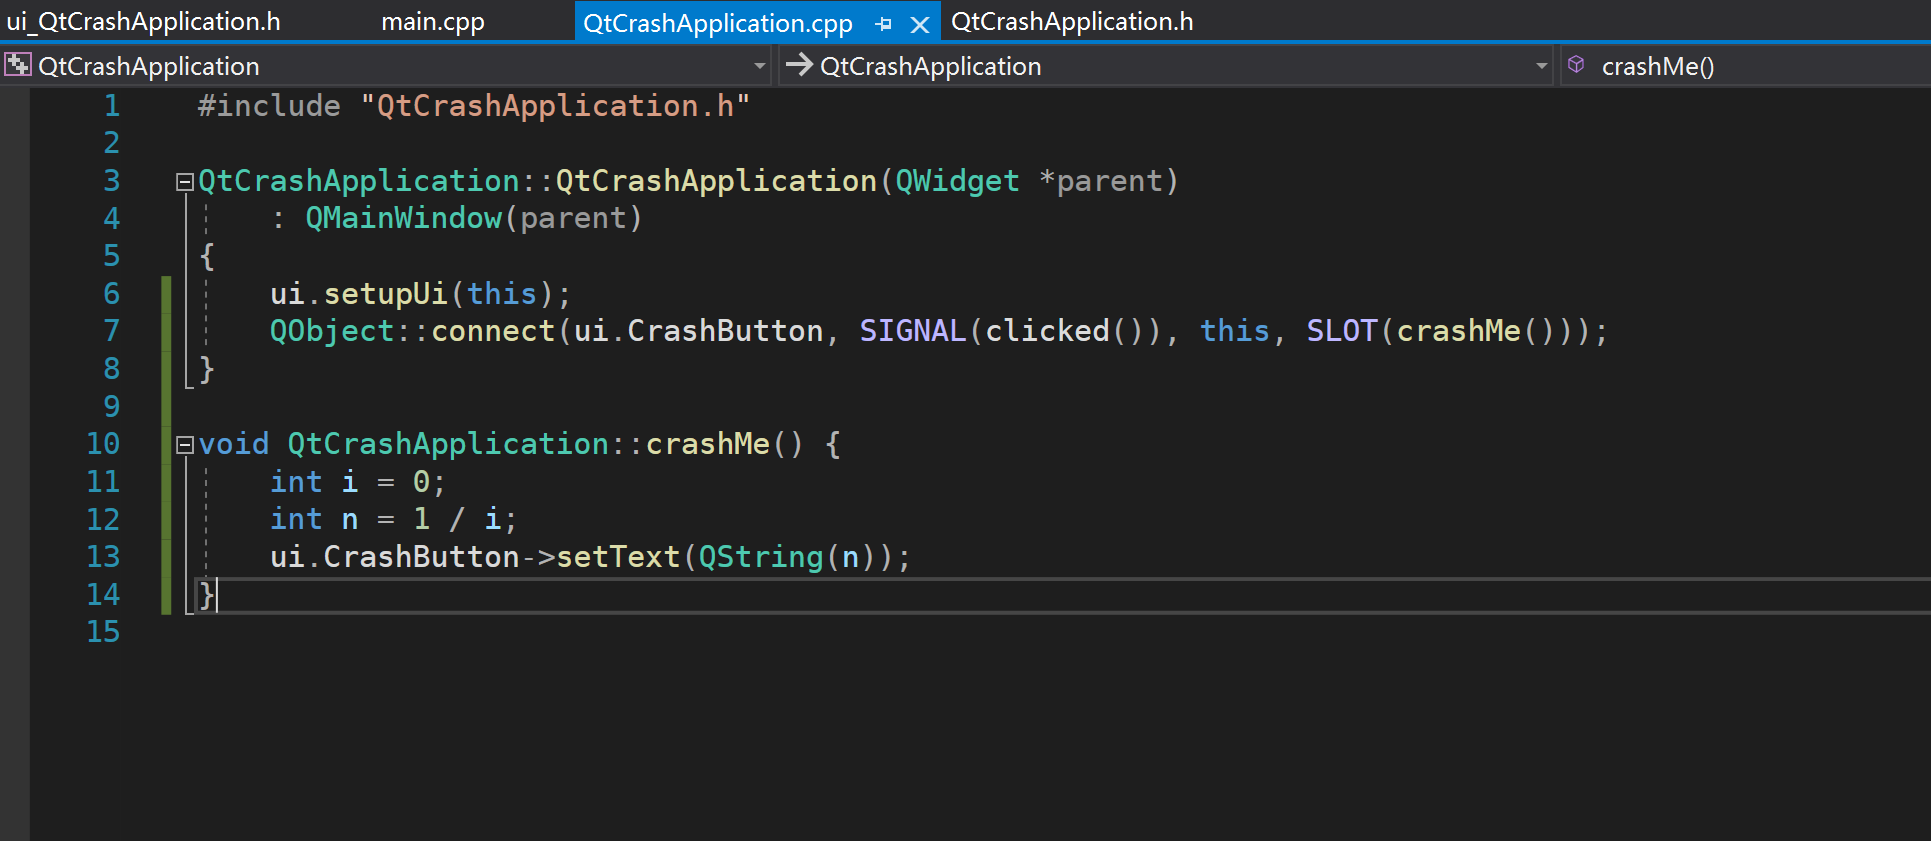
QtCrashApplication.cpp
#include "QtCrashApplication.h"

QtCrashApplication::QtCrashApplication(QWidget *parent)
    : QMainWindow(parent)
{
    ui.setupUi(this);
    QObject::connect(ui.CrashButton, SIGNAL(clicked()), this, SLOT(crashMe()));
}

void QtCrashApplication::crashMe() {
    int i = 0;
    int n = 1 / i;
    ui.CrashButton->setText(QString(n));
}
新建项目
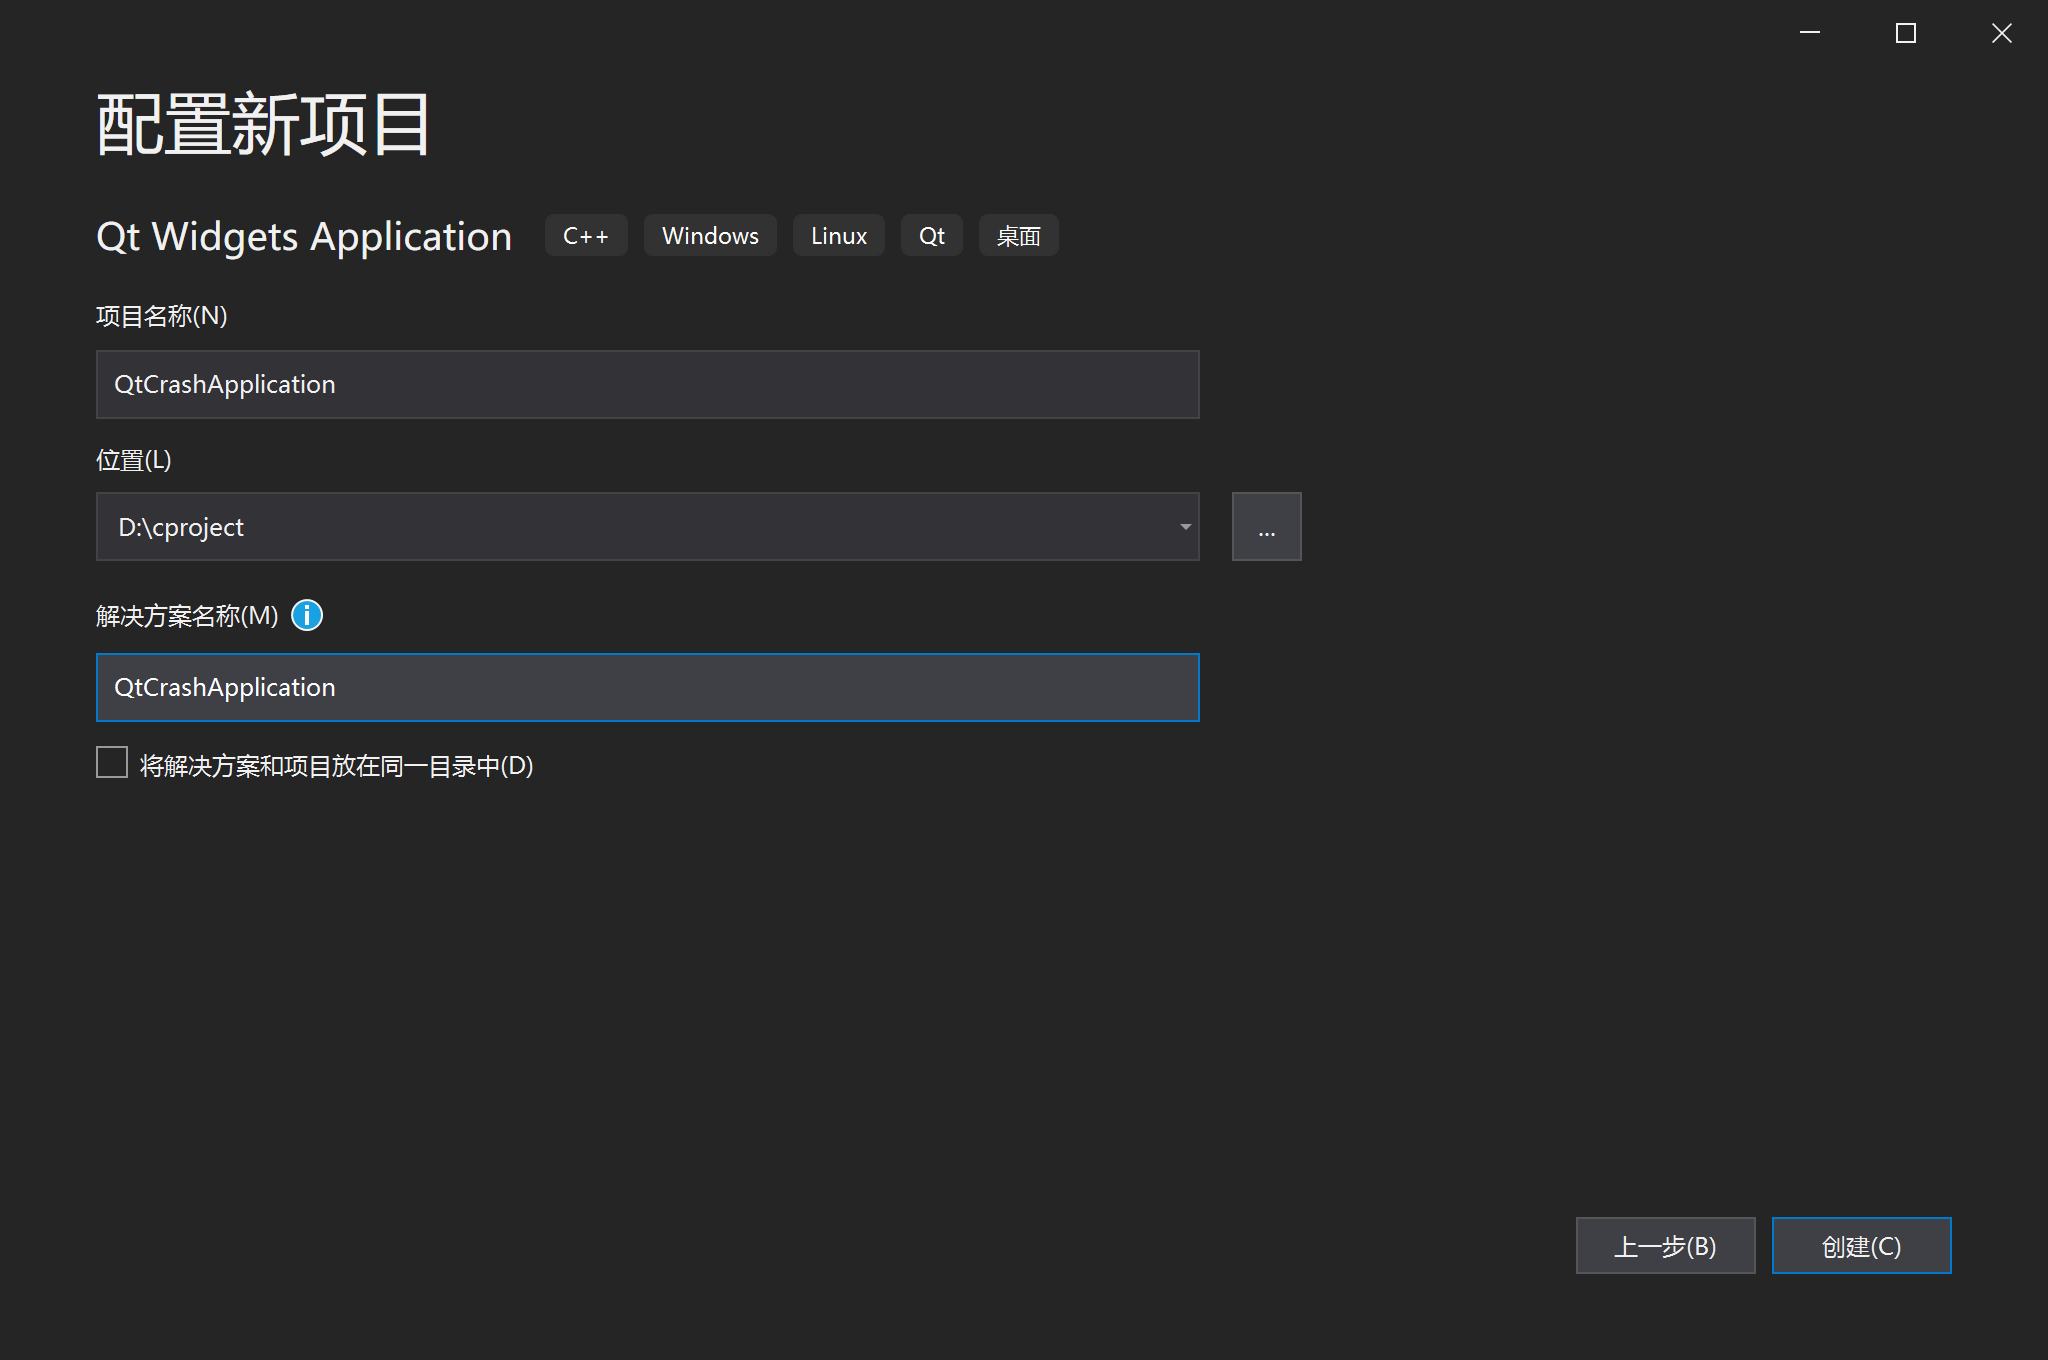
配置项目
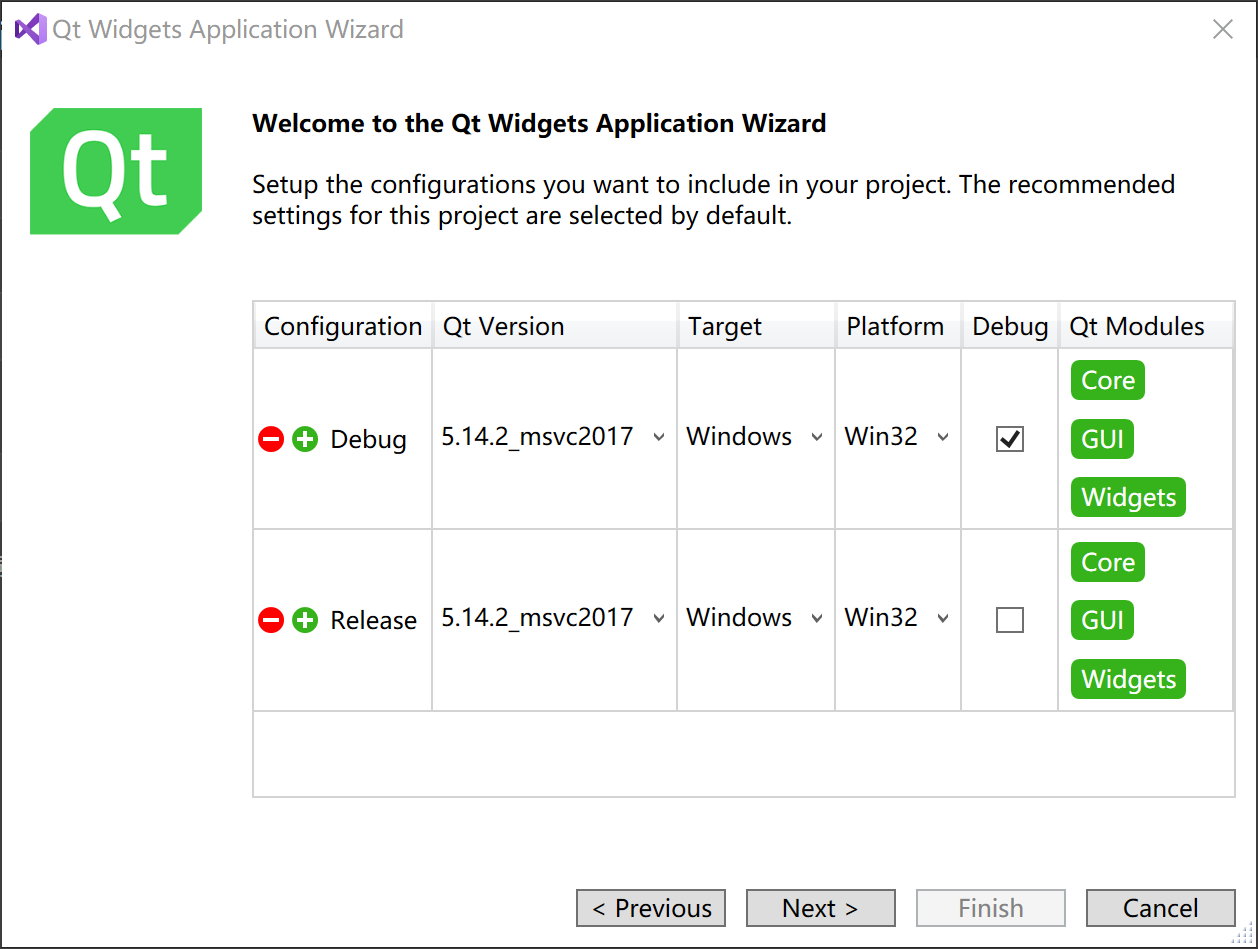
项目配置向导
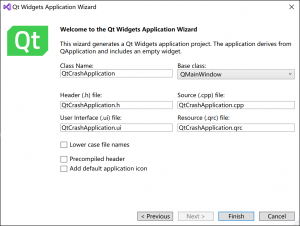
项目配置向导2
编写会奔溃程序
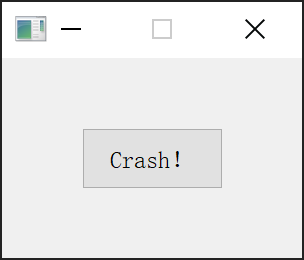
程序运行截图
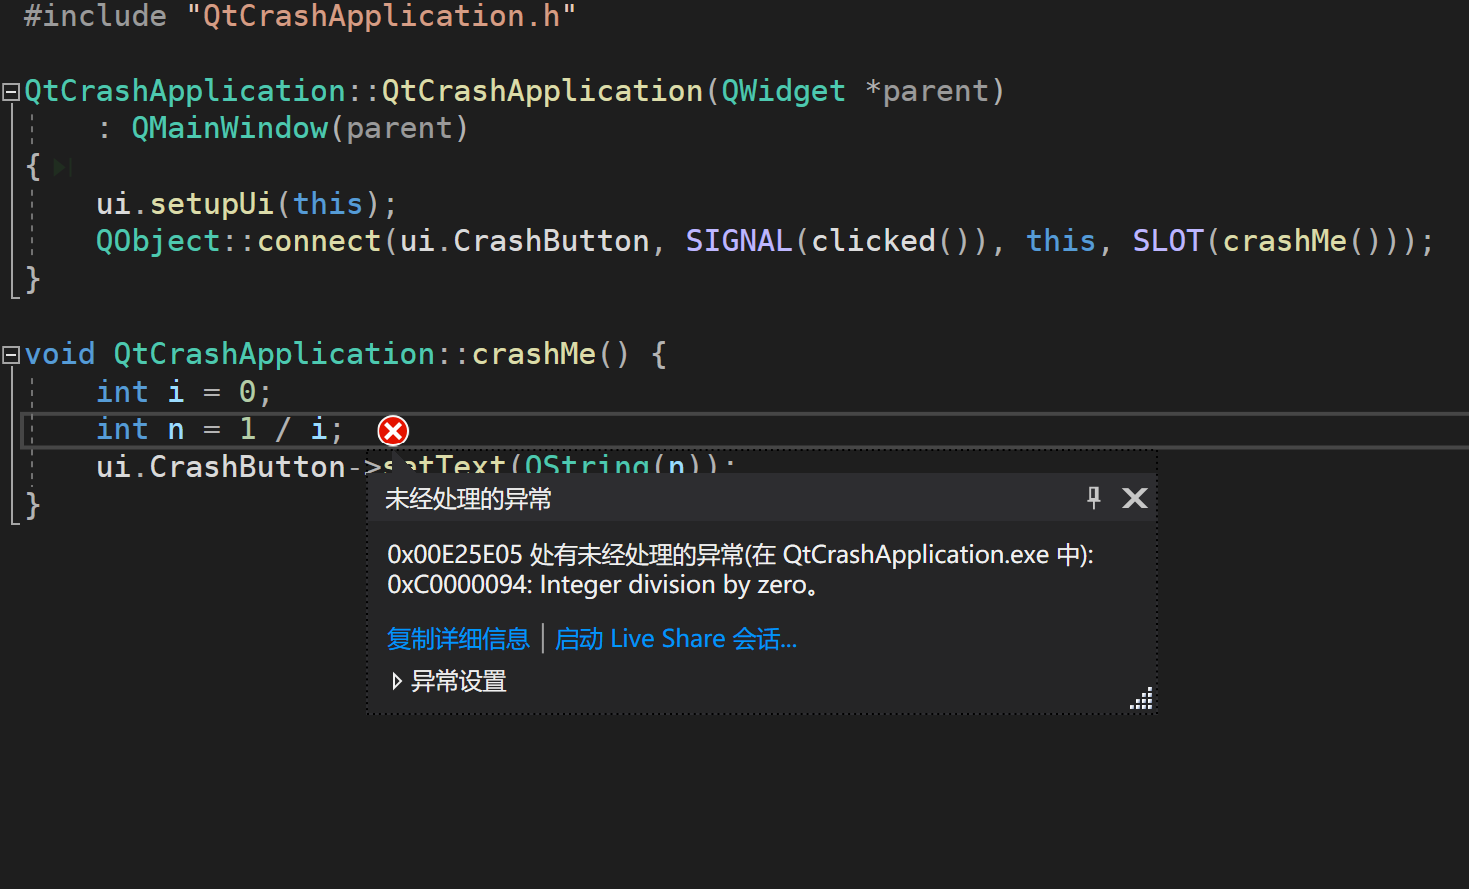
点击运行后出现异常
自动生成依赖qt库
"$(QTDIR)\bin\windeployqt.exe" "$(OutDir.TrimEnd('\'))" --$(Configuration.toLower())自动生成依赖库
生成release时生成debug信息
包含dbghelp.lib库
查看生成记录
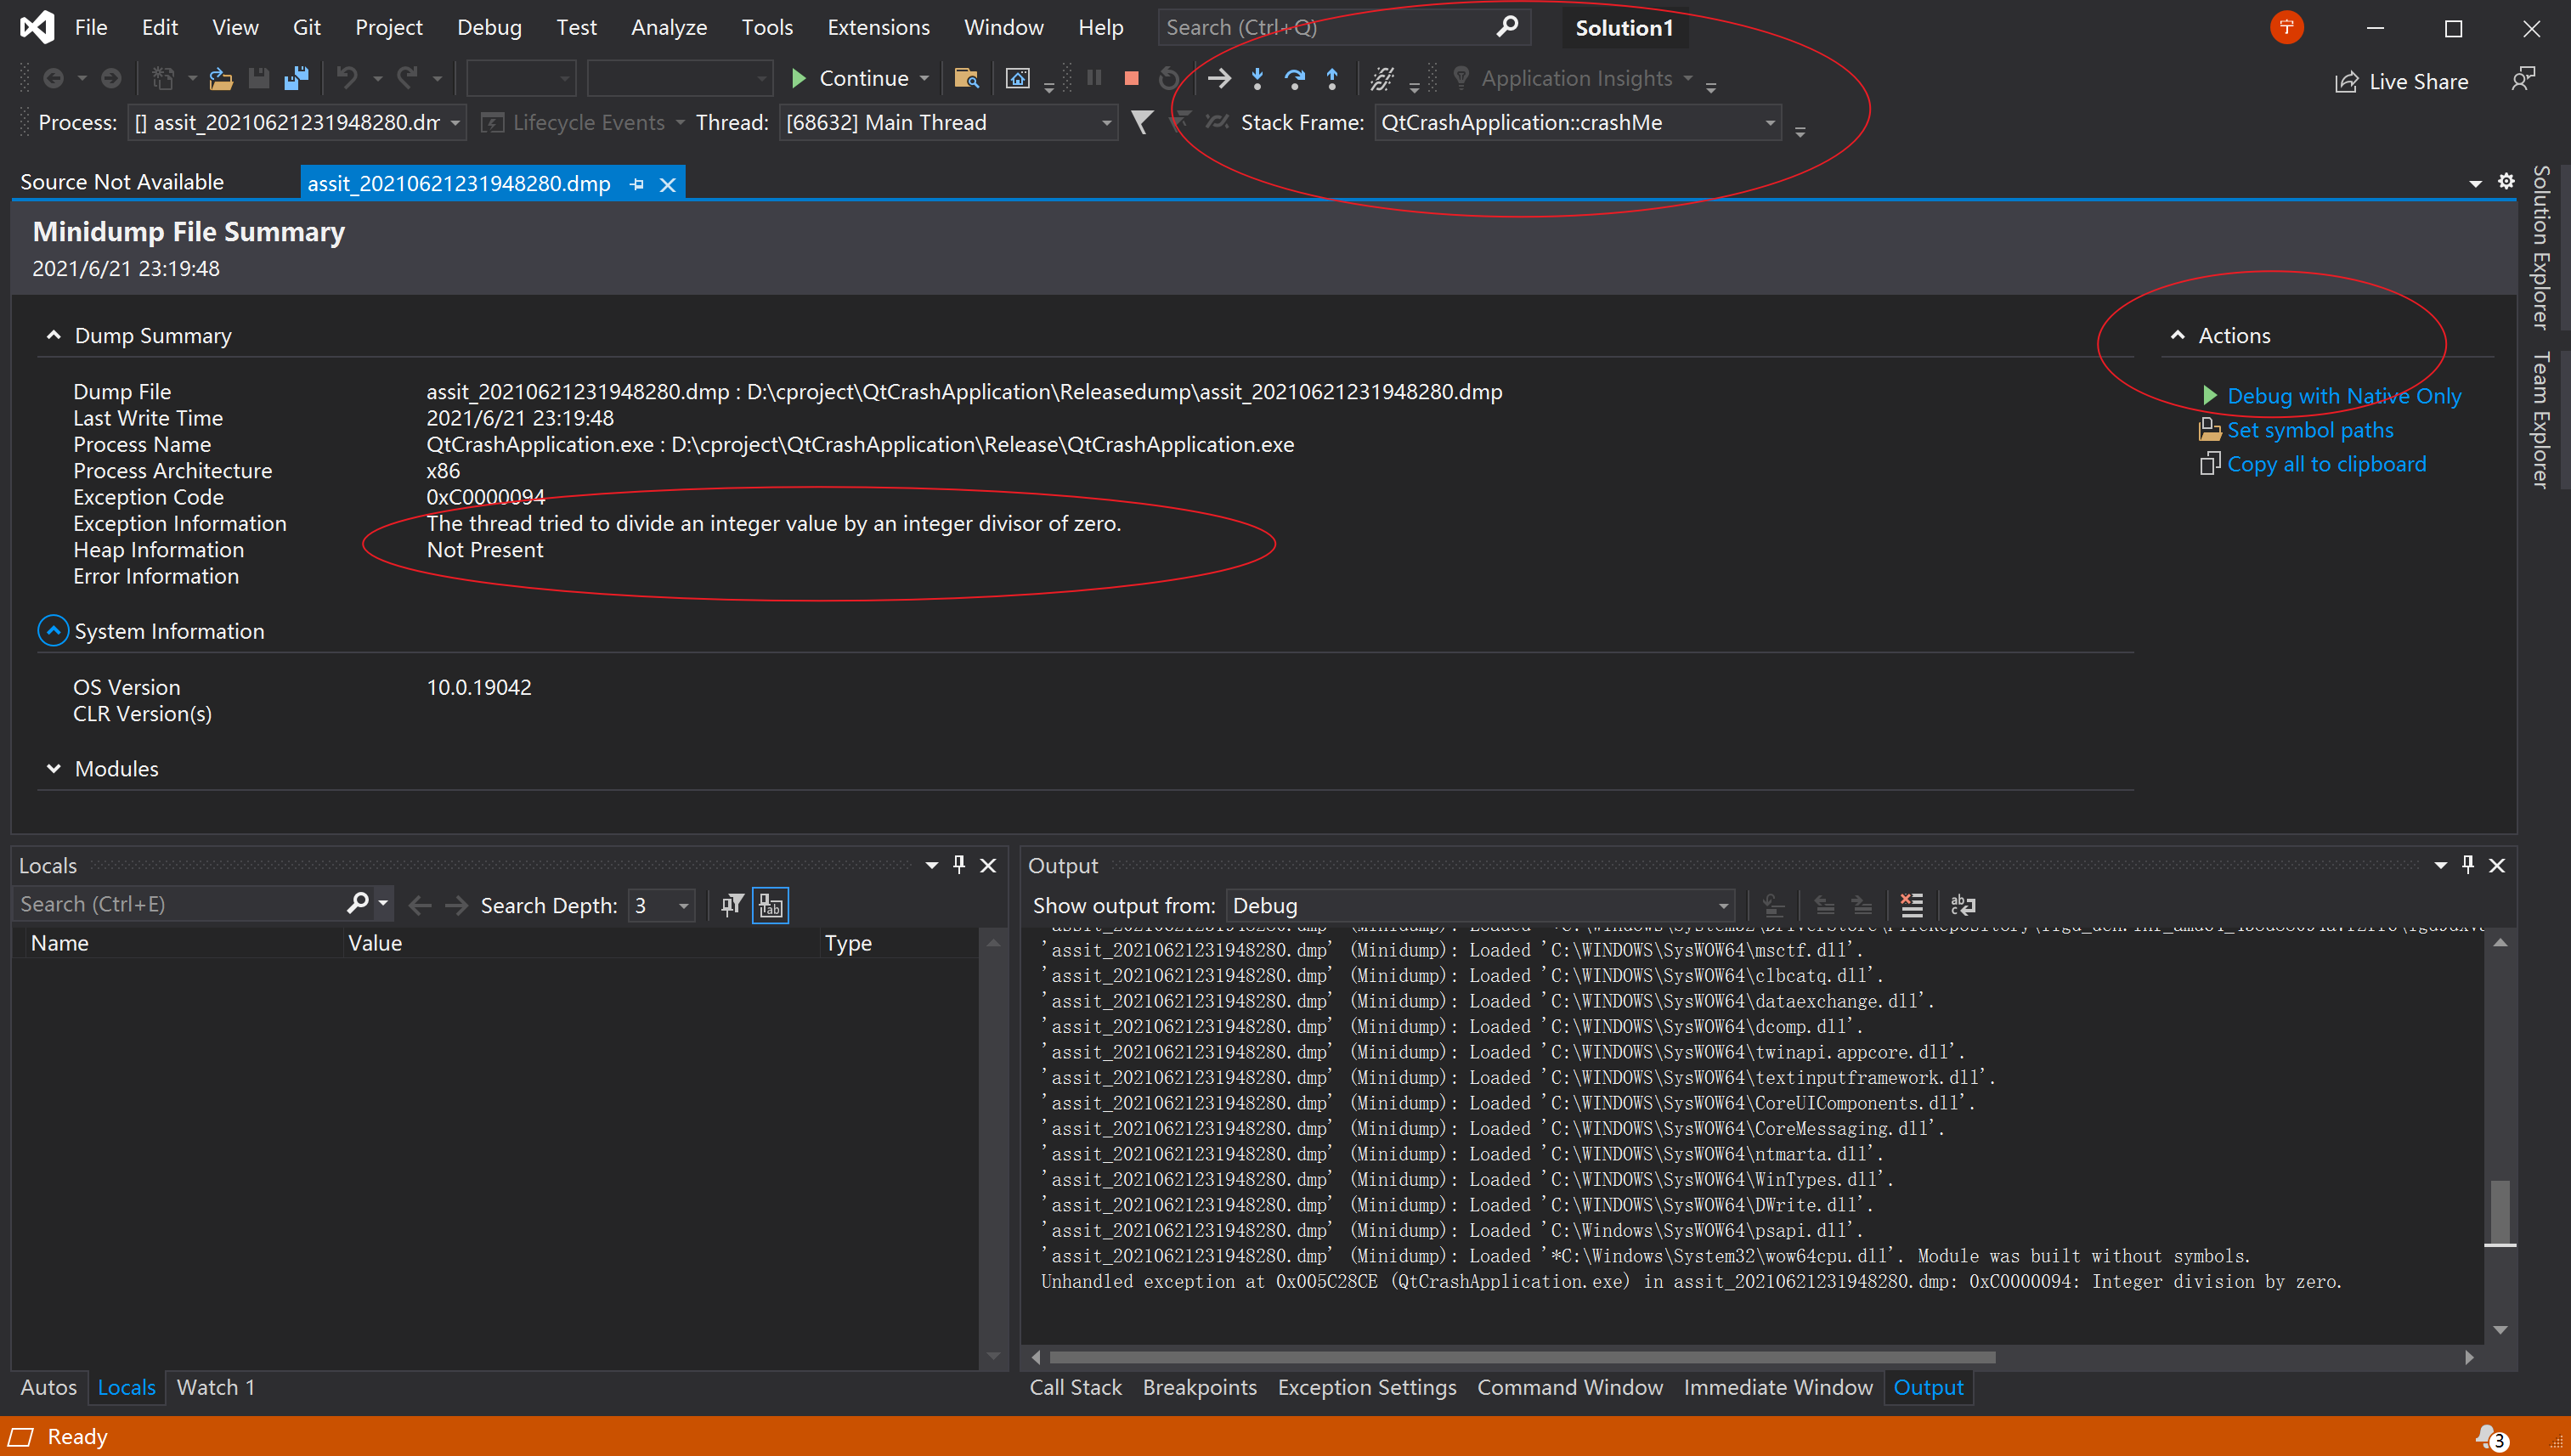
查看结果
参考
std::lock_guard — C++最简单的线程安全锁(避免死锁)
std::lock_guard 简单用法
#include <iostream>
#include <thread>
#include <mutex>

using namespace std;

int g_count = 0;
mutex g_mutex;

void increment()
{
    lock_guard<mutex> lock(g_mutex); // 开启后g_count总是可以输出20000,否则会少于20000
    ++g_count;
    this_thread::sleep_for(chrono::microseconds(2));
}

void run(int times)
{
    for (int i = 0; i < times; i++)
    {
        increment();
    }
}

int main()
{

    thread th1(run, 10000);
    thread th2(run, 10000);

    th1.join();
    th2.join();

    cout << g_count;

    return 0;
}
直接使用lock容易不对称导致死锁
#include <iostream>
#include <thread>
#include <mutex>

using namespace std;

int g_count = 0;
mutex g_mutex;

int increment1()
{
    g_mutex.lock();
    this_thread::sleep_for(chrono::microseconds(1));
    g_count++;
    g_mutex.unlock();
    return 0;
}

int increment2()
{
    g_mutex.lock();
    this_thread::sleep_for(chrono::microseconds(1));
    if (g_count > 11000)
    {
        return 0;
    }
    g_count++;
    g_mutex.unlock();
    return 0;
}

void run1(int times)
{
    for (int i = 0; i < times; i++)
    {
        increment1();
    }
}

void run2(int times)
{
    for (int i = 0; i < times; i++)
    {
        increment2();
    }
}

int main()
{

    thread th1(run1, 10000);
    thread th2(run2, 10000);

    th1.join();
    th2.join();

    cout << g_count;

    return 0;
}
使用lock_guard避免死锁
#include <iostream>
#include <thread>
#include <mutex>

using namespace std;

int g_count = 0;
mutex g_mutex;

int increment1()
{
    lock_guard<mutex> lock(g_mutex);
    this_thread::sleep_for(chrono::microseconds(1));
    g_count++;
    return 0;
}

int increment2()
{
    lock_guard<mutex> lock(g_mutex);
    this_thread::sleep_for(chrono::microseconds(1));
    g_count++;
    if (g_count > 11000)
    {
        return 0;
    }
    return 0;
}

void run1(int times)
{
    for (int i = 0; i < times; i++)
    {
        increment1();
    }
}

void run2(int times)
{
    for (int i = 0; i < times; i++)
    {
        increment2();
    }
}

int main()
{

    thread th1(run1, 10000);
    thread th2(run2, 10000);

    th1.join();
    th2.join();

    cout << g_count;

    return 0;
}
防止list下标越界,同样适用于map,set,vector等
#include <iostream>
#include <thread>
#include <mutex>
#include <list>

using namespace std;

class MonitorList
{

private:
    mutex g_mutex;
    list<int> g_list = {};

public:
    void push()
    {
        lock_guard<mutex> lock(g_mutex); // 不加会导致程序异常
        this_thread::sleep_for(chrono::microseconds(1));
        g_list.push_back(0);
    }

    void pop()
    {
        lock_guard<mutex> lock(g_mutex); // 不加会导致程序异常
        this_thread::sleep_for(chrono::microseconds(1));
        for (auto it = g_list.begin(); it != g_list.end(); ++it)
        {
            if (*it % 2 == 0)
            {
                it = g_list.erase(it);
            }
        }
    }
    int size()
    {
        return g_list.size();
    }
};

MonitorList g_MonitorList;

int main()
{

    thread th1([](int n)
               {
                   for (int i = 0; i < n; i++)
                   {
                       g_MonitorList.push();
                   }
               },
               10000);

    thread th2([](int n)
               {
                   for (int i = 0; i < n; i++)
                   {
                       g_MonitorList.pop();
                   }
               },
               3000);

    thread th3([](int n)
               {
                   for (int i = 0; i < n; i++)
                   {
                       g_MonitorList.pop();
                   }
               },
               3000);
    th1.join();
    th2.join();
    th3.join();

    cout << g_MonitorList.size() << endl;

    return 0;
}使用ab,siege,wrk,jmeter进行快速JSON API性能测试
ab
ab -c 10 -n 100 -T 'application/json' -p test.json https://abc.com/testwrk (推荐,高性能,多核多线程)
Wrk 是一个现代的 HTTP 基准测试工具,能够在单个多核 CPU 上运行时产生大量负载。它将多线程设计与可伸缩的事件通知系统(如 epoll 和 kqueue)结合在一起。
可以使用lua脚本生成测试请求
siege
siege -c50 -t60S --content-type "application/json" 'http://domain.com/path/ POST {"ids": ["1","2","3"]}'
Jmeter
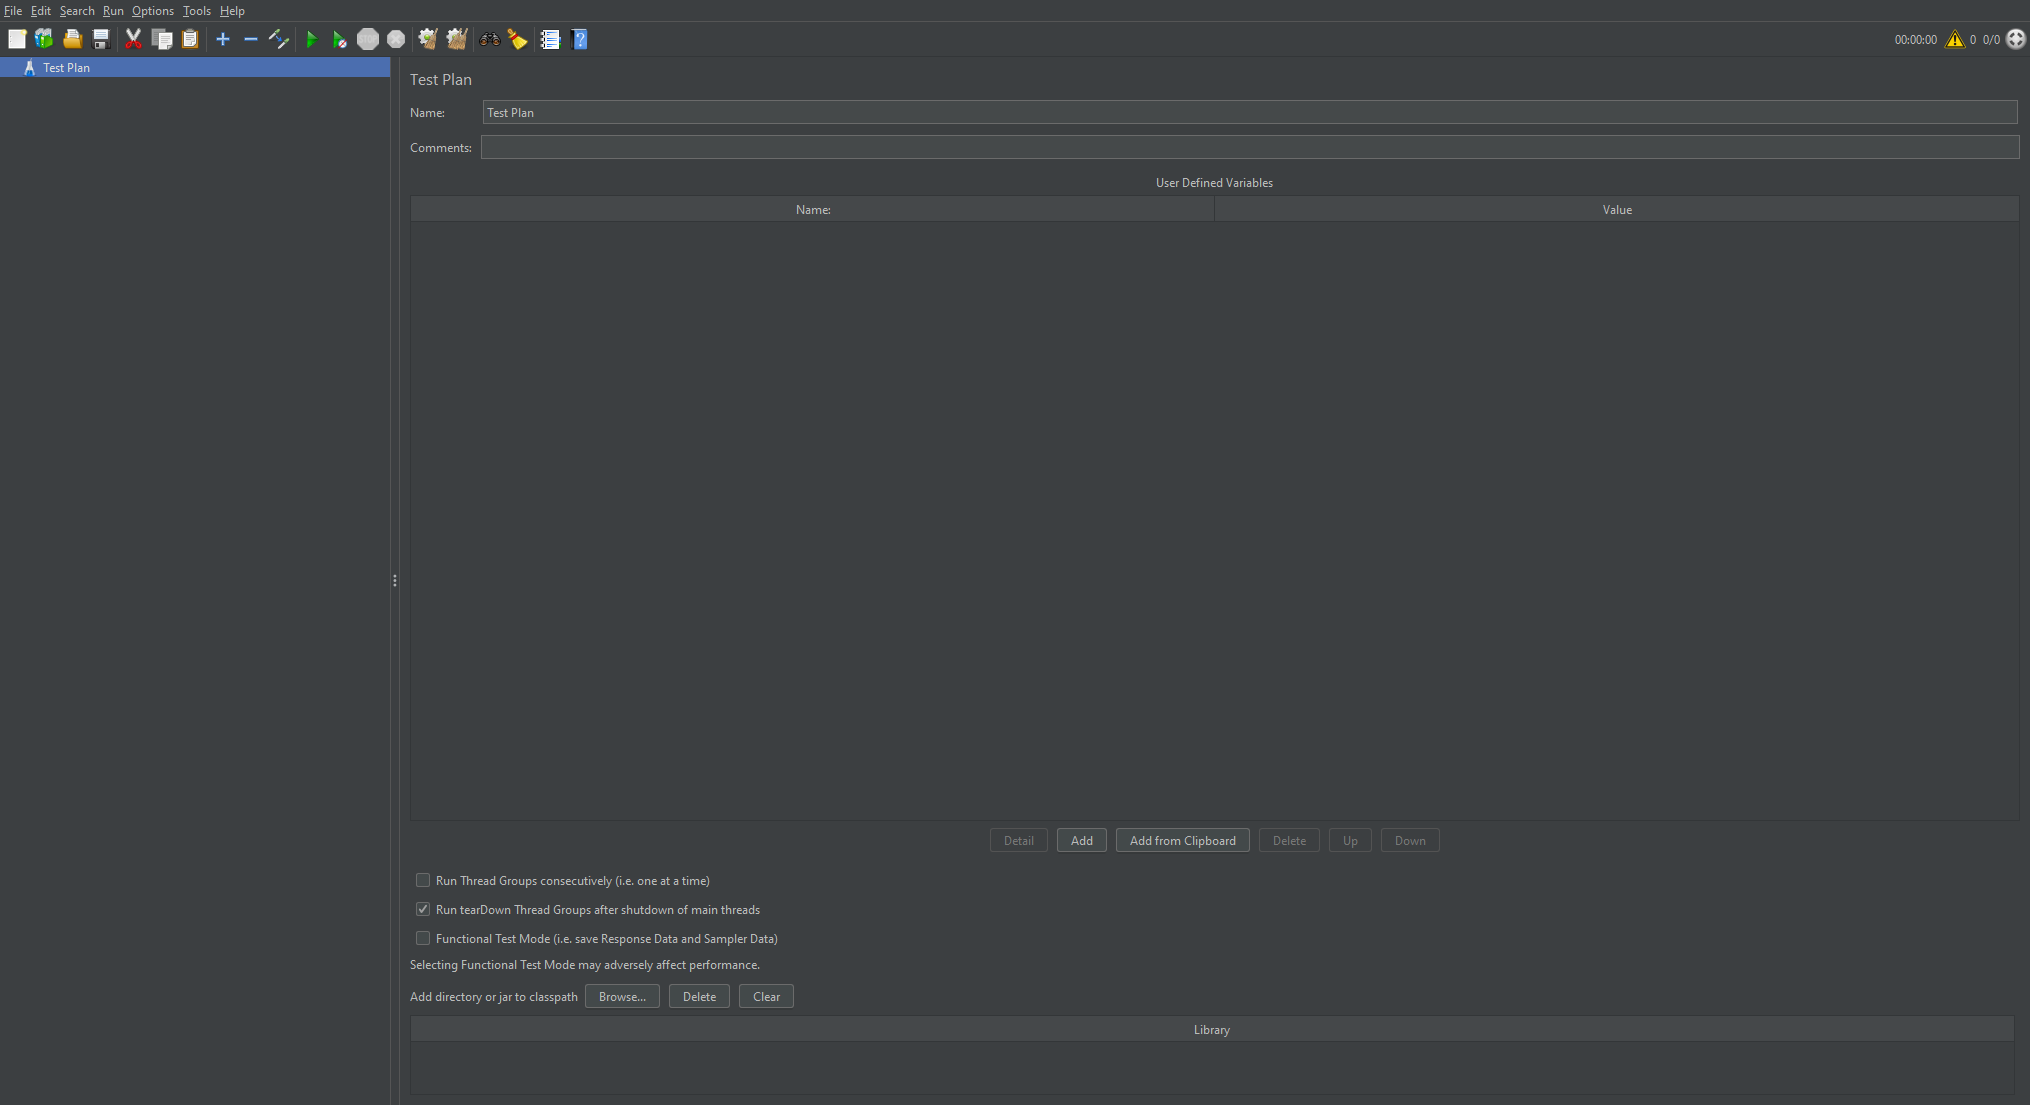
下载安装jmeter后,运行bin目录下的jmeterw.cmd即可。
待研究 plow
https://github.com/six-ddc/plow
- 跨平台,无运行时依赖(基于 golang )
- 高性能,比常见的 hey,ab,siege 等性能高不少(基本和 wrk 持平)
- 终端实时展示性能数据,包括 RPS,延迟统计,百分位,Histogram 分布等
- 支持实时网页展示,更全方面展示各时间点的压测数据
待研究 hey
基于Go语言的ab替代工具
参考
公众号消息点击后自动回复
<a href="weixin://bizmsgmenu?msgmenucontent={{自动回复内容}}&msgmenuid={{自己维护一个不重复的 ID}}">{{自动回复内容}}</a>
参考
PhpStorm/IntelliJ/Pycharm 支持git-bash以及powershell
How to use PowerShell as default terminal in IntelliJ/PhpStorm/Pycharm/…
- Open IntelliJ settings.
- Go to the “Tools” section.
- Press the “Terminal” option.
- Set the correct Shell path to the PowerShell EXE file. In the case of Windows 8.1, the path is: C:\Windows\System32\WindowsPowerShell\v1.0\powershell.exe. You should use the latest PowerShell version available!
- Create a new terminal session in IntelliJ. Alternatively, you can just restart IntelliJ to apply the changes.
C:\Windows\System32\WindowsPowerShell\v1.0\powershell.exeSetup JetBrains(InteliJ, WebStorm, PHPStorm) IDE terminal to use GIT bash
- File
- Settings
- (Enter ‘Terminal’ in search)
Change Shell path to:
"C:\Program Files\Git\bin\sh.exe" --login -i